Ginger Snap Crafts: #cricutmaker
Showing posts with label #cricutmaker. Show all posts

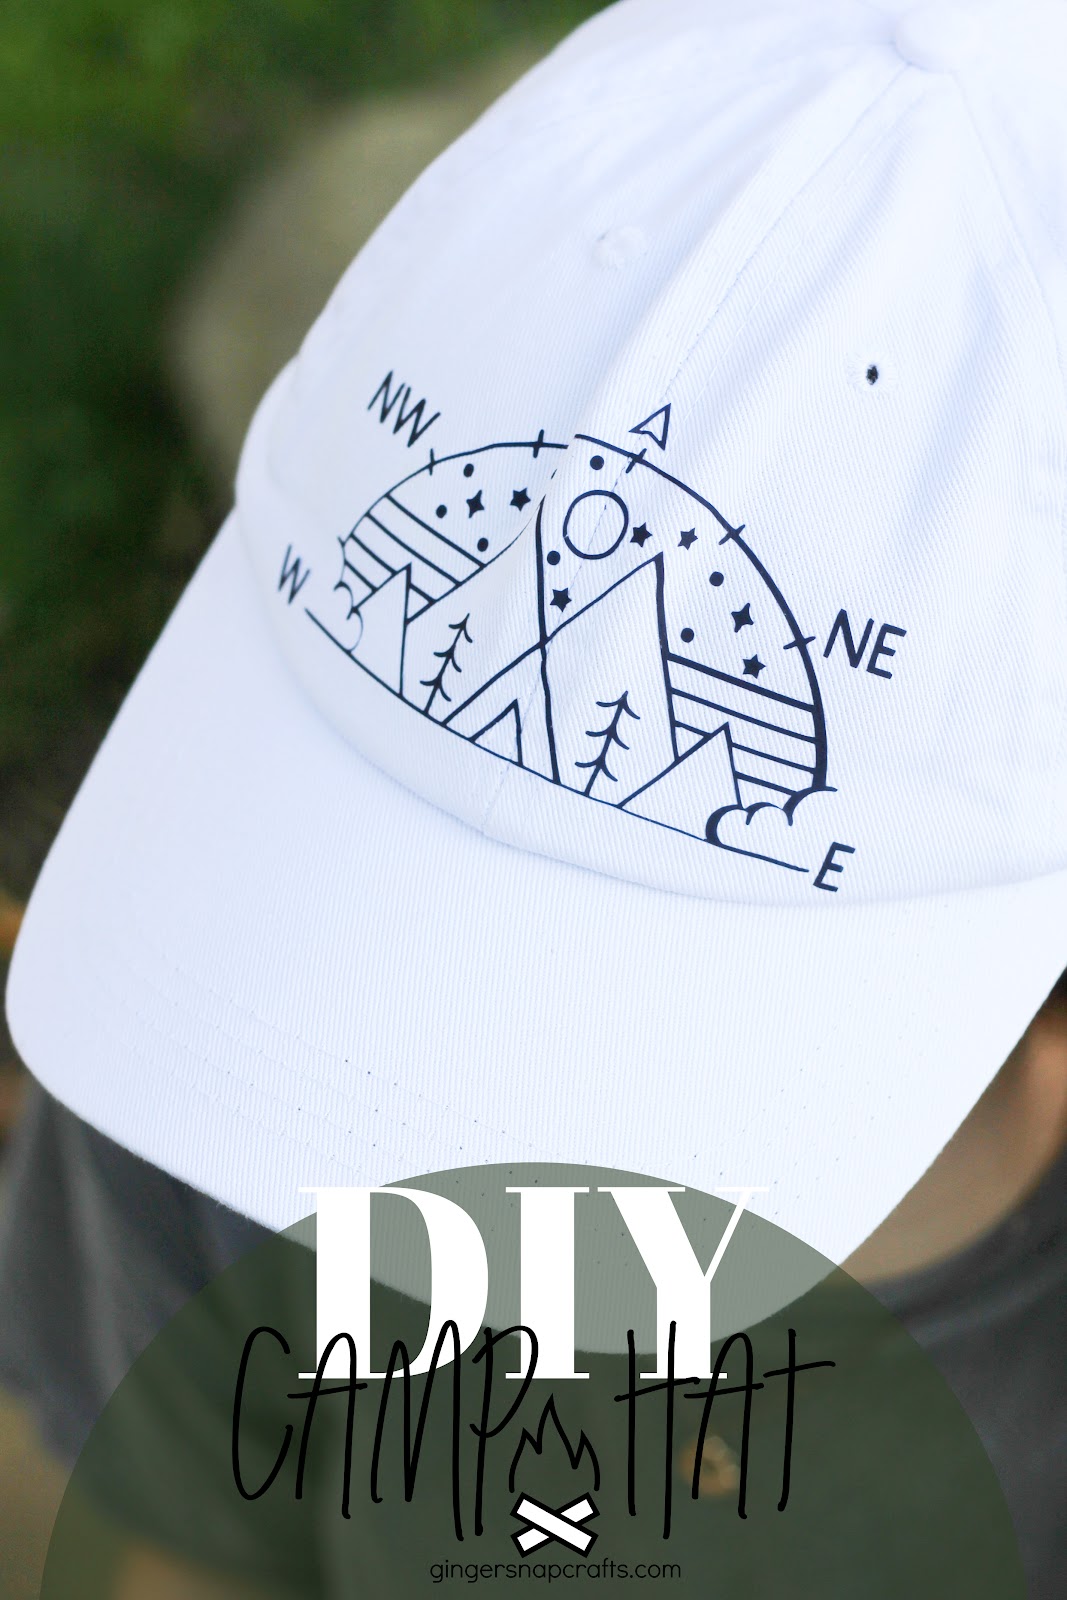
DIY Camp Hat with the Cricut Hat Press {tutorial}

This post is brought to you by Cricut. All opinions are my own. Affiliate links are used. Thank you for supporting Ginger Snap Crafts. :)

Good morning! The weather is just about to warm up! It’s almost May, and I am so looking forward to summer! Each summer my daughter attends Girls Camp for a week. Annnnnd each year they make crafts. I’ve helped quite a few times. This year she is going as a YCL (youth camp leader). So, we wanted to make her a cute hat to wear to camp. Annnnd Cricut just realeased their brand new Cricut Hat Press. So of course, our first project was this cute DIY Camp Hat. Let’s me show you how cool this new hat press is. Keep reading! :)

Conference Journal {tutorial}

This post is not sponsored by affiliate links are used. Thank you for supporting Ginger Snap Crafts. Also, thank you to Cricut and the Duck Brand for supplying some of the product for this post.

Good morning! This weekend my church holds it’s semi-annual General Conference. Church leaders including our prophet & apostles speak to us sharing inspired messages that are just for us & you, too. They are timely messages that are truly for everyone. Along with conference weekend, comes many traditions in our family, we always have a big breakfast with yummy breakfast casserole and of course, cinnamon rolls. We then watch conference, and many of us take notes as we listen to the speakers. I usually grab some inexpensive notebooks from the Dollar Tree to use for notetaking. This year I personalized them just a little bit. So I thought I’d share how to make these cute Conference Journal! Let’s get started! :)

DIY S'more Charcuterie Board with Cricut {tutorial}

This post is brought to you by Cricut. All opinions are my own. Affiliate links are used. Thank you so much for supporting Ginger Snap Crafts.

Good morning! Cooler weather is coming! You know what that means….cool, starry nights, warm campfires with friends and s’mores! Have you jumped on the charcuterie board trend? I hadn’t yet, but I couldn’t resist making a fall inspired charcuterie board full of fun things to make the perfect s’more! Of course, I had to use my Cricut machine to customize my charcuterie board for just the right look for fall. Let me show you how to make a DIY S’more Charcuterie Board with Cricut! It was so quick & easy! :)

Cricut Maker 3 & Cricut Explore 3 are available today!

This post is brought to you by Cricut. All opinions are my own. Affiliate links are used. Thank you so much for supporting Ginger Snap Crafts.

Good morning! Today is the day! The Cricut Maker 3 and Cricut Explore 3 are available for purchase on Cricut.com! I am anxiously waiting for mine to arrive, and I will have an unboxing & full review headed your way very soon! Which one will I get? Stay tuned!

What are you most excited about with either machine? For me, I am most ecstatic about cutting without a mat & being able to cut up to 12 feet long! My crafty dreams are coming true! I have compared the Silhouette & Cricut machines before, & the mat and cutting length were one of my only cons to the Cricut machines over the Silhouette. Now that concern is gone! Yay! BTW you can see that review here. Now let me just share a few highlights from these amazing new smart machines. Let’s get started! :)

What Materials Can I cut With My Cricut?

This is a sponsored post written by me on behalf of Cricut. All opinions are 100% mine.

So you have a Cricut, now what? :) I have to admit when I first got my Cricut machine the majority of the time I used it for cutting vinyl. Boring, right?! ha! ;) You can literally cut hundreds of materials with your Cricut Explore Air 2, Cricut Maker or Cricut Joy. So today we are going to answer the question: What materials can I cut with my Cricut? There’s a ton! Annnnd once you start experimenting with different materials, there is no looking back. Cricut Explore, Cricut Maker & Cricut Joy machines all cut so many materials that the only limit really is your imagination. From something as delicate as tissue paper to thick leather, these amazing machines can do just about everything your crafty heart desires. :)


How can I make money using my cricut machine?

This is a sponsored conversation written by me on behalf of Cricut. The opinions and text are all mine. Affiliate links are used. Thank you for supporting Ginger Snap Crafts.

Good morning! Today we are going to tackle another commonly asked Cricut question that I get all the time. How can I make money using my Cricut machine? Can I use my Cricut Maker or Cricut Explore Air 2 or even the Cricut Joy to bring in an income? The answer is YES! Absolutely! My cutting machines have literally paid for themselves many times over. Let me show you how. :)


How to Make Custom Mugs with Cricut Infusible Ink & Mug Press {tutorial}

This post is sponsored by Cricut. All opinions are my own.

Did you hear the news that went live today? Cricut has another ah-mazing machine to help make even more of our crafty dreams come true! ha! If you didn’t hear, Cricut released their brand new Cricut Mug Press today. Eek! The Cricut Mug Press is a new way to create DIY & personalized mugs in minutes. It has a one touch setting, just right temperature control & an auto cut off feature. So you don’t have to worry if you left it on, once you leave the house! I love that! There are several ways to make customize mugs with this new machine, but today I’d love to share one way ~ how to make custom mugs with Cricut Infusible Ink sheets, your Cricut machine & Cricut Mug Press. Let’s get started! :)

Halloween Neighbor Gift {tutorial}

This is not a sponsored post, but affiliate links are used. Thank you for supporting Ginger Snap Crafts. :)

Good morning! Today I am excited to share a simple Halloween Neighbor Gift Idea. I know it’s a little early to get all spooky on you, but by the way time is flying, Halloween will be here before you know it! ha! This year won’t be like any we’ve seen before, I’m sure! So I am already planning to make some neighbor gifts I can just drop by to friends & family! I’ll be sharing the Cricut Design Space file for these cute tags, and I have a free printable if you don’t own a Cricut. So, I’ve got you covered either way! :) I’m also taking part in the Creative Halloween Crafts blog hop. So be sure to check that out, too. Let’s get started! :) #bestcreativecrafts

Back to School Owl Pillow with Cricut Infusible Ink {tutorial}

This is a sponsored post written by me on behalf of Cricut. All opinions are 100% mine. Affiliate links are used. Thank you for supporting Ginger Snap Crafts. :) #cricutcreated #infusibleink

Are you ready to take Cricut’s Infusible Ink to the next level? Cricut is so excited to introduce their new lineup of Infusible Ink Blanks  & Infusible Ink transfer sheets! Yay! :)

As I reminder, I shared my first Infusible Ink post several months ago. You can see that here. I told you then that with Cricut Infusible Ink the personalization possibilities are endless. Infusible Ink brings personalization to the next level with its vibrancy & permanence. Yes, it is permanent! You can wash these again & again & your design will stay put & vibrant. You truly can get professional results with this new product. You’ll impress all your friends, & they won’t believe that YOU made this! :)

I used Cricut Infusible Ink & their new pillow cover blank to make this cute Back to School Owl Pillow for our school room! Let me show you how. :)

DIY Teacher Sign with the Cricut Maker {tutorial}

This is a sponsored post written by me on behalf of Cricut. All opinions are 100% mine.

Good morning! I know many of you are thinking about getting a Cricut. You might be asking yourself, “Is it easy to use a Cricut?” or “How does a Cricut work?” or “What can I make with Cricut?”. Well, I am here to answer all those questions & more. ;) Annnnd if you have any other questions, let me know those, too! :) The best way to show what a Cricut machine can do is to walk you through a project. I recently made this DIY Teacher Sign (for my brother!) with my Cricut Maker. Let me show you how I made this & answer some of those burning questions! :)

15 Cricut Projects to Make at Home Today

This is a sponsored post written by me on behalf of Cricut. All opinions are 100% mine.

Affiliate links are used. Thank you for supporting Ginger Snap Crafts.

Good morning! Yesterday I shared a cute paper puppet tutorial with Cricut,and I told you about how Cricut is making it even easier to create at home. They have released 1000 free images into Design Space & are sharing tons of make at home projects on their blog. These past few weeks have been a little bit trying to say the least. Annnnnd crafting (for me anyways!) brings me a sense of peace, normalcy & calmness. Keep calm & craft on! Right? ;) We could all use a little bit more of that in our lives right now. :) So today I’m excited to share 15 Cricut Projects to Make at Home Today with you from some of my favorite Cricut bloggers. Let’s get started! :)

Chalkboard Banner with Cricut {tutorial} & Party Idea Blog Hop

This post is not sponsored, but affiliate links are used. Thanks for supporting Ginger Snap Crafts. :)

Good morning! I am excited to partner today with some of my favorite bloggers to bring you tons of fun party ideas made with our Cricut machines. :) Fun, right? I think the most important party decor is the banner. Am I right? I love hanging happy birthday banners, good luck banners, congratulation banners, etc. for any party or occasion that I host. That’s why I love this Chalkboard Banner. It’s super cute, and you can change it up depending on what occasion you are celebrating. Let me show you how easy is was to put together. :) (Annnnd you’ll want to scroll down all the way to the bottom of this post. I have links to all the other party ideas there! So fun!)

25+ Personalized Christmas Ideas with Cricut

This is a sponsored conversation written by me on behalf of Cricut. The opinions and text are all mine.

Good morning! I’m back! I hope you all had a wonderful Thanksgiving break. Annnnd look here comes Christmas! :) A few weeks ago I shared my cute personalized stocking tutorial made with my Cricut Explore Air 2 and my cute EasyPress Mini with you. I talked about how much I love to personalize those holiday moments, about our family’s stocking tradition & how easy that was to do with my Cricut family of products. Well, guess what? Some of my favorite Cricut bloggers were all given that exact same assignment ~ to share a personalized Christmas project & to share the meaning or story behind it & the tutorial. I love that each of us took our own spin to that fun topic. Annnnnd today I’d love to show off some of my fellow Cricut bloggers with these 25+ Personalized Christmas Ideas with Cricut. Let’s get started! :)

Huge Sale on Cricut Maker Bundles

This is a sponsored conversation written by me on behalf of Cricut. The opinions and text are all mine.

Hi! I’m back! If you missed my Cricut Gift Guide post from this morning, hurry over & pin that post for later. I shared all the must haves for the vinyl obsessed crafter like me. :) Now I’m back with an amazing deal from Cricut, and this one is all about the Cricut Maker! Eek! Starting today you can save a bunch on some really ah-mazing Cricut Maker bundles. Keep reading for all the details! :)

DIY Polka Dot Shoes with the Cricut Easypress Mini

This is a sponsored conversation written by me on behalf of Cricut. The opinions and text are all mine.

Good morning! How was your weekend? Ours was fabulous! The weather was nice & cool, and we got to spend lots of time together as a family. I missed my college kids though! I even got to break out my newest crafting tool ~ the Cricut EasyPress Mini. This new tool from Cricut is so, so cute, and it makes the perfect companion to any size EasyPress you might already have. It’s perfect for small & unique projects like these adorable DIY Polka Dot Shoes. So, today I am excited to share that tutorial with you plus give you all the details on this cute little crafting machine. Let’s get started. :)

Are you ready to upgrade your Cutting Machine to a Cricut?

This is a sponsored conversation written by me on behalf of Cricut. The opinions and text are all mine.

Good morning! Have you been thinking about upgrading your older model Cricut machine or competitor machine for a sleek new Cricut Maker or Cricut Explore Air 2? Then this might be the time to do it! Eek! Cricut has launched a Trade Up program today that will save you money and get a brand new Cricut machine in your hands to create all the things. So keep reading! I’m sharing all the details today. Get excited! :)


Peel-A-Way Banana Card with Cricut Maker {tutorial}

This is a sponsored conversation written by me on behalf of Cricut. The opinions and text are all mine.

Good morning! :) When Cricut launched the Cricut Maker 2 years ago, they made a promise to come out with more tools & more materials. They have not disappointed! :) Over the last few years the Maker’s arsenal of tools has grown & along with that creators (like you & me) have had the chance to master new crafts & create things we never knew we could. It’s truly ah-mazing!  These tools are all possible, & can be used only with Maker, because it was specially designed with an Adaptive Tool System. Recently Cricut released 4 more tools (Eek!!!) made especially for the Maker using this system. Annnnnd I can’t wait to tell you all about them. I used two of those tools to make this cute Peel-a-way Banana Card. Let’s get started. I’ve got a lot to tell you! :)


Peony Paper Flower + Cricut EasyPress & Infusible Ink Giveaway Bundle {tutorial}

This post is not sponsored by Cricut, but affiliate links are used.

Good morning! I am super excited today to join with some of my favorite Cricut bloggers to bring you a fun Summer of Flowers event. Throughout this week, we will all be sharing our favorite flower inspired projects using our Cricut machines. :) Today I am excited to share this Peony Paper Flower tutorial with you. :) Annnnnd did I mention that I have a huge Cricut giveaway for you, too? Yep! I do! So, let’s get started.

DIY Reusable Back to School Sign with Cricut {tutorial}

This is a sponsored conversation written by me on behalf of Cricut. The opinions and text are all mine.

Good morning! Back to school is right around the corner! Annnnnd I love using my Cricut Maker to personalize all the things! :) With my Cricut Maker, I can make cute back to school signs, personalized notebooks, binders, lunch boxes and more. The possibilities are endless! Today I’d love to show you how made this cute DIY Reusable Back to School Sign & a few other easy back to school ideas. Let’s get started. :)

For these projects you will need:
Cricut Premium Vinyl
Cricut Maker
Cricut Glitter Vinyl
Cricut Transfer Tape
Cricut StrongGrip Transfer Tape
Cricut Essential Tool Set
Cricut StandardGrip Mat
8x10 frame
black cardstock
paper trimmer
spiral notebook
storage box
#MA523FBA image in Design Space

Alright, let’s get to these easy tutorials. :)

***To make this back to school sign you’ll need this design from Design Space .*

I used removable white premium vinyl for this project. I love this vinyl because:

  • You can remove it without residue for up to 2 years.
  • It lies nice & flat. So, you can cut with ease & accuracy every time. 
  • It is easy to weed & effortless to apply.

After your vinyl is cut out, carefully begin the weeding process by remove the excess vinyl.

Then use your weeding tool to remove all the tiny pieces inside the letters & shapes.

Next, carefully apply a piece of transfer tape over the top of the vinyl.

Flip it over, and then just as carefully remove the backing paper leaving the vinyl on the transfer tape.

Next grab your frame. I cut a piece of black cardstock to fit my frame & put it inside the frame. Then I applied the vinyl to the front of the glass. Be careful! Place your vinyl carefully into place. Vinyl loves glass! ;) It will stick almost instantly! So, be sure your vinyl is lined up & exactly where you want it before laying it down. Rub gently & then carefully remove the transfer tape leaving the vinyl behind. Easy! :)

To fill in the blanks have your kiddo use a chalk marker. It writes amazingly well on the glass. Use a damp cloth to erase, and you can use this sign again & again for multiple kiddos & over multiple years. This would make a fun first day of school tradition. :)

Snap a picture of your kiddo after they fill it out, and you will have a keepsake to last forever. :)

I also wanted to share two more cute back to school personalization projects with my Cricut Maker with you. I just couldn’t stop once I got started. ha! The first one is how I personalize a plain spiral notebook with some cute vinyl. ***You can find this cute “a unicorn ate my homework” design right here in Design Space.***

For this project, I used both the premium vinyl & glitter vinyl. With the glitter vinyl, you’ll want to use the Cricut StrongGrip Transfer Tape for best results.

First, I applied my regular vinyl then the glitter horn.

The possibilities with this are endless. Your kiddos can even help design their notebooks to exactly how they like! Design Space has thousands & thousands of designs. My son wants me to make him a robot one next! :)

Alright, here is my last idea (for now!). I found these cute locker boxes that have a divided tray on top & with storage underneath. I thought they’d be perfect to hold my kiddos’ school supplies in. ***I found these cute school labels in Design Space right here.***

I simply applied the vinyl inside each compartment.

Isn’t that the cutest thing ever? ;) It makes my heart happy!

In the bottom I put the scissors label. It also has room to hold a few more random things.

My kiddos had fun filling up each spot with their school supplies. I love it! :)

What would you like to personalize for back to school? Let me know! :)

Enjoy these other fun back to school projects. :)

Back to School Photo Prop

Back to School Messenger Bag

10 Back to School Printables
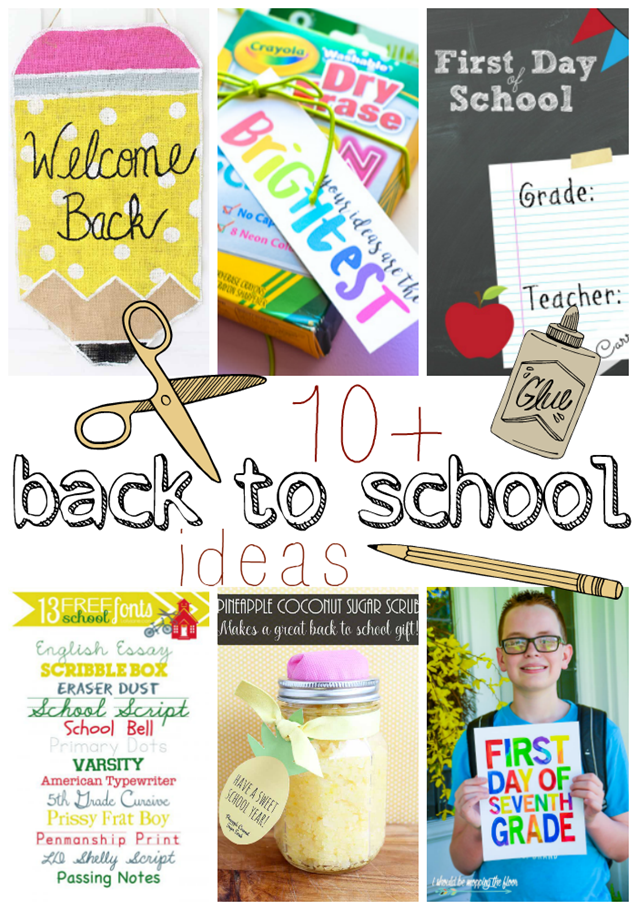
10 Back to School Ideas

Connect with me on facebook or instagram.
Question or comment? Shoot me an email at ginger@gingersnapcrafts.com. :)

Thank you so much for stopping by my blog!
If this is your first time visiting, I’d love to keep in touch.

.

DIY Tote & Coaster Set with Cricut Infusible Ink {tutorial}

This is a sponsored conversation written by me on behalf of Cricut. The opinions and text are all mine.

I love my Cricut Maker, and I really love all the fun things it can do! It can cut, score, draw & so much more. I love how Cricut is always coming up with new tools & products for my machine all the time as well. The possibilities are endless. Annnnd one of the newest products that Cricut has launched lately is Cricut Infusible Ink! Now I can make vibrant, pretty, permanent designs on totes, tees, coasters & more. You can find out lots more at infusibleink.com. Buuuut first let me show you how I made this DIY Tote & Coaster Set using Cricut Infusible Ink, my Cricut Maker & Cricut EasyPress 2. Let’s get started! :)