Ginger Snap Crafts: personalized
Showing posts with label personalized. Show all posts

Personalized Phone Case with Cricut JOY {tutorial}

This post is not brought to you by Cricut, but affiliate links are used. Thank you for supporting Ginger Snap Crafts.

Good morning! We were bored the other day. ha! So my daughter & I decided to do a quick project with my Cricut Joy. She wanted to make a personalized phone case for her iPhone 6s, & in a couple of minutes we had a super cute case! We also made a case for her older brother. (This cut file could be tweaked to fit just about any phone!) So let’s get started! :)


25+ Personalized Christmas Ideas with Cricut

This is a sponsored conversation written by me on behalf of Cricut. The opinions and text are all mine.

Good morning! I’m back! I hope you all had a wonderful Thanksgiving break. Annnnd look here comes Christmas! :) A few weeks ago I shared my cute personalized stocking tutorial made with my Cricut Explore Air 2 and my cute EasyPress Mini with you. I talked about how much I love to personalize those holiday moments, about our family’s stocking tradition & how easy that was to do with my Cricut family of products. Well, guess what? Some of my favorite Cricut bloggers were all given that exact same assignment ~ to share a personalized Christmas project & to share the meaning or story behind it & the tutorial. I love that each of us took our own spin to that fun topic. Annnnnd today I’d love to show off some of my fellow Cricut bloggers with these 25+ Personalized Christmas Ideas with Cricut. Let’s get started! :)

DIY Reusable Back to School Sign with Cricut {tutorial}

This is a sponsored conversation written by me on behalf of Cricut. The opinions and text are all mine.

Good morning! Back to school is right around the corner! Annnnnd I love using my Cricut Maker to personalize all the things! :) With my Cricut Maker, I can make cute back to school signs, personalized notebooks, binders, lunch boxes and more. The possibilities are endless! Today I’d love to show you how made this cute DIY Reusable Back to School Sign & a few other easy back to school ideas. Let’s get started. :)

For these projects you will need:
Cricut Premium Vinyl
Cricut Maker
Cricut Glitter Vinyl
Cricut Transfer Tape
Cricut StrongGrip Transfer Tape
Cricut Essential Tool Set
Cricut StandardGrip Mat
8x10 frame
black cardstock
paper trimmer
spiral notebook
storage box
#MA523FBA image in Design Space

Alright, let’s get to these easy tutorials. :)

***To make this back to school sign you’ll need this design from Design Space .*

I used removable white premium vinyl for this project. I love this vinyl because:

  • You can remove it without residue for up to 2 years.
  • It lies nice & flat. So, you can cut with ease & accuracy every time. 
  • It is easy to weed & effortless to apply.

After your vinyl is cut out, carefully begin the weeding process by remove the excess vinyl.

Then use your weeding tool to remove all the tiny pieces inside the letters & shapes.

Next, carefully apply a piece of transfer tape over the top of the vinyl.

Flip it over, and then just as carefully remove the backing paper leaving the vinyl on the transfer tape.

Next grab your frame. I cut a piece of black cardstock to fit my frame & put it inside the frame. Then I applied the vinyl to the front of the glass. Be careful! Place your vinyl carefully into place. Vinyl loves glass! ;) It will stick almost instantly! So, be sure your vinyl is lined up & exactly where you want it before laying it down. Rub gently & then carefully remove the transfer tape leaving the vinyl behind. Easy! :)

To fill in the blanks have your kiddo use a chalk marker. It writes amazingly well on the glass. Use a damp cloth to erase, and you can use this sign again & again for multiple kiddos & over multiple years. This would make a fun first day of school tradition. :)

Snap a picture of your kiddo after they fill it out, and you will have a keepsake to last forever. :)

I also wanted to share two more cute back to school personalization projects with my Cricut Maker with you. I just couldn’t stop once I got started. ha! The first one is how I personalize a plain spiral notebook with some cute vinyl. ***You can find this cute “a unicorn ate my homework” design right here in Design Space.***

For this project, I used both the premium vinyl & glitter vinyl. With the glitter vinyl, you’ll want to use the Cricut StrongGrip Transfer Tape for best results.

First, I applied my regular vinyl then the glitter horn.

The possibilities with this are endless. Your kiddos can even help design their notebooks to exactly how they like! Design Space has thousands & thousands of designs. My son wants me to make him a robot one next! :)

Alright, here is my last idea (for now!). I found these cute locker boxes that have a divided tray on top & with storage underneath. I thought they’d be perfect to hold my kiddos’ school supplies in. ***I found these cute school labels in Design Space right here.***

I simply applied the vinyl inside each compartment.

Isn’t that the cutest thing ever? ;) It makes my heart happy!

In the bottom I put the scissors label. It also has room to hold a few more random things.

My kiddos had fun filling up each spot with their school supplies. I love it! :)

What would you like to personalize for back to school? Let me know! :)

Enjoy these other fun back to school projects. :)

Back to School Photo Prop

Back to School Messenger Bag

10 Back to School Printables
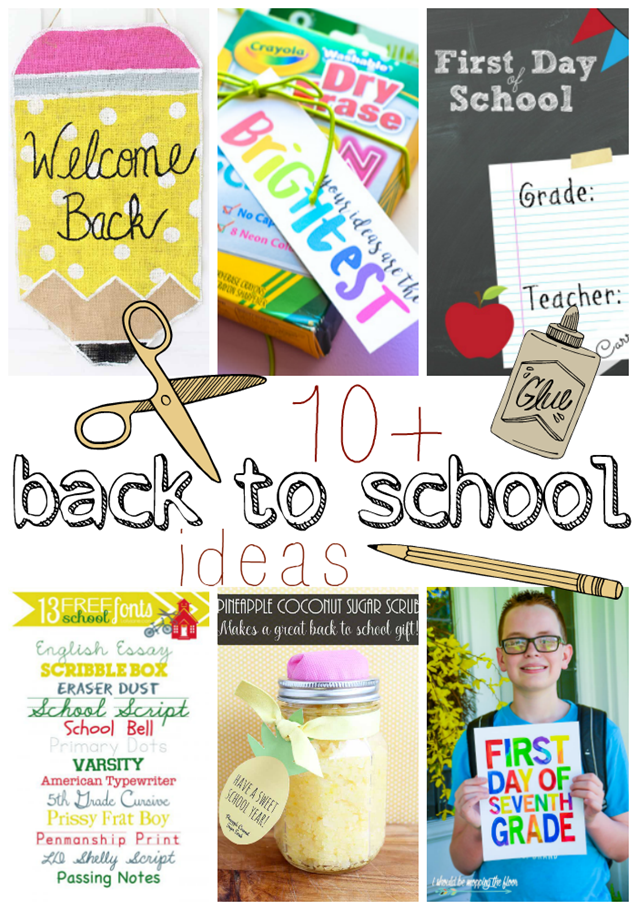
10 Back to School Ideas

Connect with me on facebook or instagram.
Question or comment? Shoot me an email at ginger@gingersnapcrafts.com. :)

Thank you so much for stopping by my blog!
If this is your first time visiting, I’d love to keep in touch.

.

Personalized Baby Blanket {tutorial}

Good morning! One thing I love about blogging is the good we can all do when we work together. Recently Kimbo from A Girl in a Glue Gun let me know about two amazing organizations (here & here) that collect handmade blankets for kiddos in need. You can read all about it over in her post. I know not all of us are experts at sewing! (Ummmm….me!) Buuuut today I’d love to share how to personalize a baby blanket to give it that handmade look. I’m also sharing a link to how I make the easiest & softest baby blanket ever. I’m also sharing links to blanket tutorials from some of your favorite bloggers. So let’s get started!

Personalized Baby Blanket at GingerSnapCrafts.com   #blanketsforluke

blanket tutorial

unnamed (12)

Photo Puzzle {tutorial}

This post is brought to you by DecoArt.

Hello! Happy Monday! On Saturday I shared an easy mini canvas tutorial with a picture of my cute kiddos, and it reminded me of this easy Photo Puzzle that I made last year & shared over on the DecoArt blog. I never shared it here. So I thought it was about time I did. ;) This is such a fun way to display your photos, & your kiddos will LOVE a personalized puzzle of themselves. So let’s get started. ;)

DIY photo puzzle using Americana Satin Decoupage #DecoArt

Get a Free 8x8” Photo Book from Zoggin (& Some Snow Pictures)

This post is brought to you by Zoggin.

Hello! Just popping in really quick to let you know about an awesome deal over at Zoggin. You can get a FREE 8x8” photo book when you use the code FREEBOOK at checkout! All you have to pay for is a flat shipping rate that’s only $5. Awesome! I know I love making personalized photo books, & they make great gifts, too. :) So head over here & check it out. :) Annnd (in case you were wondering! ha!) we are in our 7th straight day of being snowed in! Yikes! So keep reading to see some fun snow pictures. :)

zoggin_8x8freebook_fb2

{wow me} wednesday #115 & a Swanky Press Discount

This post is brought to you by Swanky Press.
Welcome to  {wow me} wednesday!


So glad YOU are here!

Tonight’s party is brought to you by Swanky Press! Swanky Press is an awesome place to start for all things personalized, & they have tons of fun stuff for back to school! :)

Swanky Press
Swanky Press is a one stop destination for hip personalized goods and cool party goods.  Most of their designs are original to Swanky Press so you won't find them anywhere else.  They also will customize your order free of charge. You can change the color, patterns, fonts or design as you choose.  Best of all, Swanky Press donates to Blood:Water Mission. With every order, Swanky Press helps provide clean drinking water to a child in Africa for an entire year. Love that!

Here are just a few of the fun personalized products you can find over at Swanky Press.
 
lunchbox-wtih-lid
What I LOVE about these roomy lunch kits is that the inside lid is chalkboard!
You can write fun messages to your kiddos! Isn’t that so cute??!!
landing-lunchbox

Right now you can use the code LB0708 to get $5 off all lunchboxes at Swanky Press until August 9th! So hurry! These lunch boxes are perfect for getting ready and going back to school. :)


SO are you ready to PaRty?
 

tutorial {personalized soap dispenser}

personalized soap dispenser
 
Today I'd love to show you how to
make your own personalized soap dispenser.
These are super easy, and would make a perfect gift
for a teacher, housewarming or just because. :)
(FYI:  I sale the vinyl to make these my esty shop, here.)


You'll need:
a soap dispenser
(Just peel off the labels & scrub off any sticky residue.) 
silver vinyl for the B (Times New Roman font)
black vinyl for the last name, Bowie (My Own Topher font)
matching ribbon


Making this is easy. 
You apply the B vinyl first,
and then put the Bowie over it.
(For more detailed vinyl application instructions you can click here.)


Then your bottle will look like this:


Add some matching ribbon.

IMG_2035

That's it! Cute & easy! :)


Pin It