
This is a sponsored post written by me on behalf of Cricut. All opinions are 100% mine. Affiliate links are used. Thank you for supporting Ginger Snap Crafts. :) #cricutcreated #infusibleink
Are you ready to take Cricut’s Infusible Ink to the next level? Cricut is so excited to introduce their new lineup of Infusible Ink Blanks & Infusible Ink transfer sheets! Yay! :)
As I reminder, I shared my first Infusible Ink post several months ago. You can see that here. I told you then that with Cricut Infusible Ink the personalization possibilities are endless. Infusible Ink brings personalization to the next level with its vibrancy & permanence. Yes, it is permanent! You can wash these again & again & your design will stay put & vibrant. You truly can get professional results with this new product. You’ll impress all your friends, & they won’t believe that YOU made this! :)
I used Cricut Infusible Ink & their new pillow cover blank to make this cute Back to School Owl Pillow for our school room! Let me show you how. :)


I love the new Infusible Ink Blanks just released from Cricut. In addition to t-shirts, body suits, totes & coasters, you now have access to cosmetic bags, wine bags, pillow covers & toddler sized t-shirts. :)
You will get vibrant, permanent, pro-quality heat press transfers – no edges or seams – with these compatible Infusible Ink blanks & infusible ink transfer sheets. Unlike an iron-on transfer or vinyl application, where artwork is attached on top of a compatible material using adhesive, an Infusible Ink heat transfer becomes one with the material itself. The results are bright, beautiful, seamlessly smooth transfers that are flake-proof, peel-proof, and wash-proof. TIP: Use Infusible Ink Blanks for best results when using Cricut’s Infusible Ink Transfer Sheets. Also, these blanks & transfer sheets can be used with ANY cutting machine!
![]()
Alright, let’s get to the tutorial. :)
For this project you will need:
Cricut Maker
Cricut cutting mat
Cricut glitter vinyl (red)
Cricut Infusible Ink (I used this pattern.)
Cricut Infusible Ink blank (pillow cover)
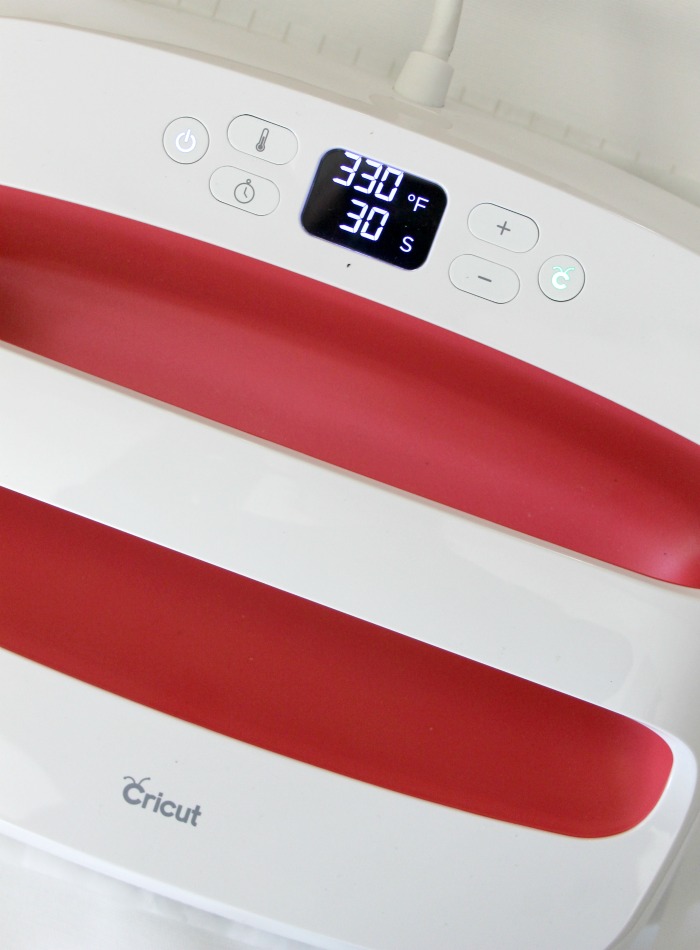
Cricut EasyPress
Cricut EasyPress Mat
You’ll want to read this post for more detailed instructions. Also, go here to find all the Infusible Ink how-tos that you’ll ever need from Cricut. :)
First, you’ll pick which transfer sheet to use. I’m kind of crazy about buffalo check, so it was an easy pick for me! ha! ;)

You can find the Design Space file I used right here.
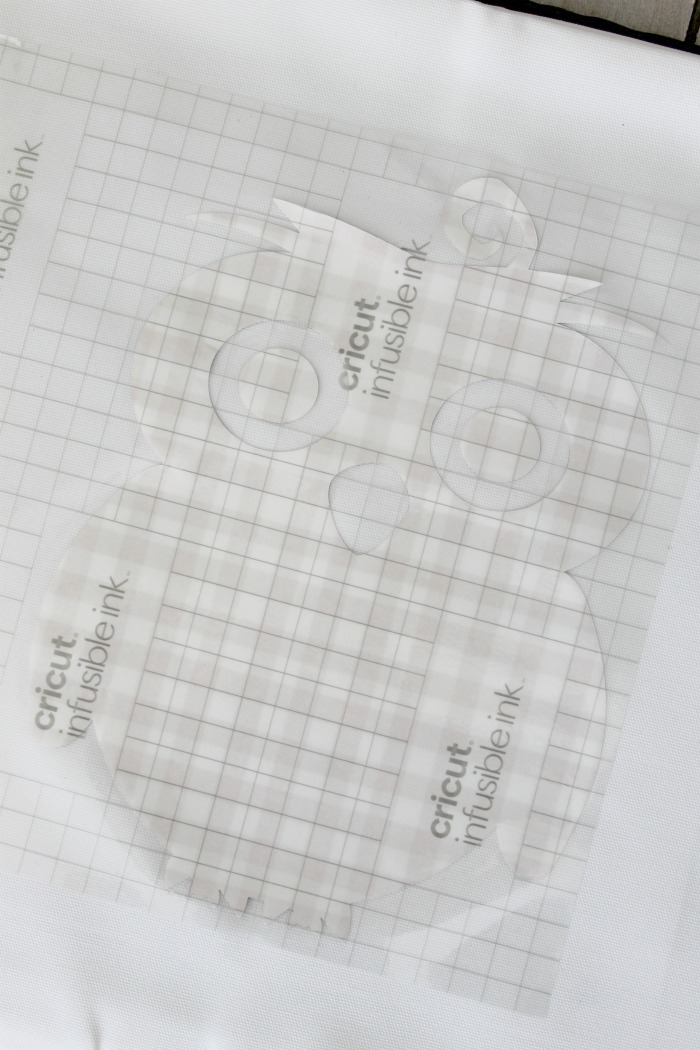
First, I cut out my design. The owl was cut using an Infusible Ink transfer sheet. The glasses with glitter vinyl.

I applied my owl first. Follow this guidelines in the Cricut Heat Transfer Guide.

Then I applied the glitter vinyl on top adjusting the time & temperature for that material.

I wasn’t sure how the layering would work, but it turned out beautiful! Annnnnd so cute! ;)

What would you make with Cricut Infusible Ink? Let me know! Please pin this post for later.

Connect with me on facebook or instagram.
Question or comment? Shoot me an email at ginger@gingersnapcrafts.com. :)
Thank you so much for stopping by my blog!
If this is your first time visiting, I’d love to keep in touch.

.
