
Hello friend!!
I am SUPER excited to be here today at Ginger Snap Crafts
But first, I must remember my manners & thank the EXTRAORDINARY Ginger for having me.
It's truly an honor to be here sharing a Christmas idea with you!

I'm Laura Beth from A Step in the Journey, but my friends call me LB.
It's great to meet you!
My little space in the blogosphere is a "jack of all trades, (but master of none)" kind of blog. It details my adventures in crafting, sewing, cooking, living, and believing! I'd love for you to join me in the journey.
Today I want to share with you two simple and VIRTUALLY free pieces of Christmas Canvas Art.

Supplies:
Empty toilet paper & paper towel rolls
Craft Paper
Spray Paint
Wooden Letters
Twine
Hot Glue Gun
Green Paint Swatches
Now let's get started.
Trim the rolls with scissors. For the Christmas tree I cut each piece at around two inches.
However, for the poinsettias, I didn't really measure, so we'll call it "thin."
You'll need 10 2" pieces, and 20 thin pieces.
Then lay out your designs.
When you are satisfied (or realize this is the best it's going to get :o) hot glue your pieces together.

Add the letters to get a visual for your layout...do you need to add anything else? I didn't think so!

Now we are going to spray paint. I didn't take into account how much the cardboard would soak up the spray paint, so I would recommend several coats!
**PLEASE do this outside and try not to inhale the fumes...


I would also recommend using a clothespin or something other than your fingers to hold your pieces while spraying :o)

Leave the pieces outside to dry and drink some hot chocolate. It is the Christmas season after all!
While inside it's time to do some cutting. I used this handy circle maker I bought on a whim, but you could just cut the 10 circles with a 2" diameter. This will be used on the Christmas tree later.


(I think it's made by either Fiskar or Elmer's. I can't remember.)
Back outside we go to gather our colorful handiwork. And this is where I became over focused and forgot to snap a few pictures. But don't worry, I can talk you through it!
Let's start with the tree.
Attach the cut circles to the backside of the Christmas tree (make sure the blank side is facing you and the pattern is coming through the hole when viewing from the front.)
After your circles are snug...glue everything down!
I added a twine border to add just a little extra. {And let me interject and say if you don't have a roll of twine/jute on hand, head to Wal-Mart RIGHT now. It's my right hand man when crafting!"}

Oh, and I almost forgot, the trunk, an unpainted 2 inch piece, so I guess you better cut 11!
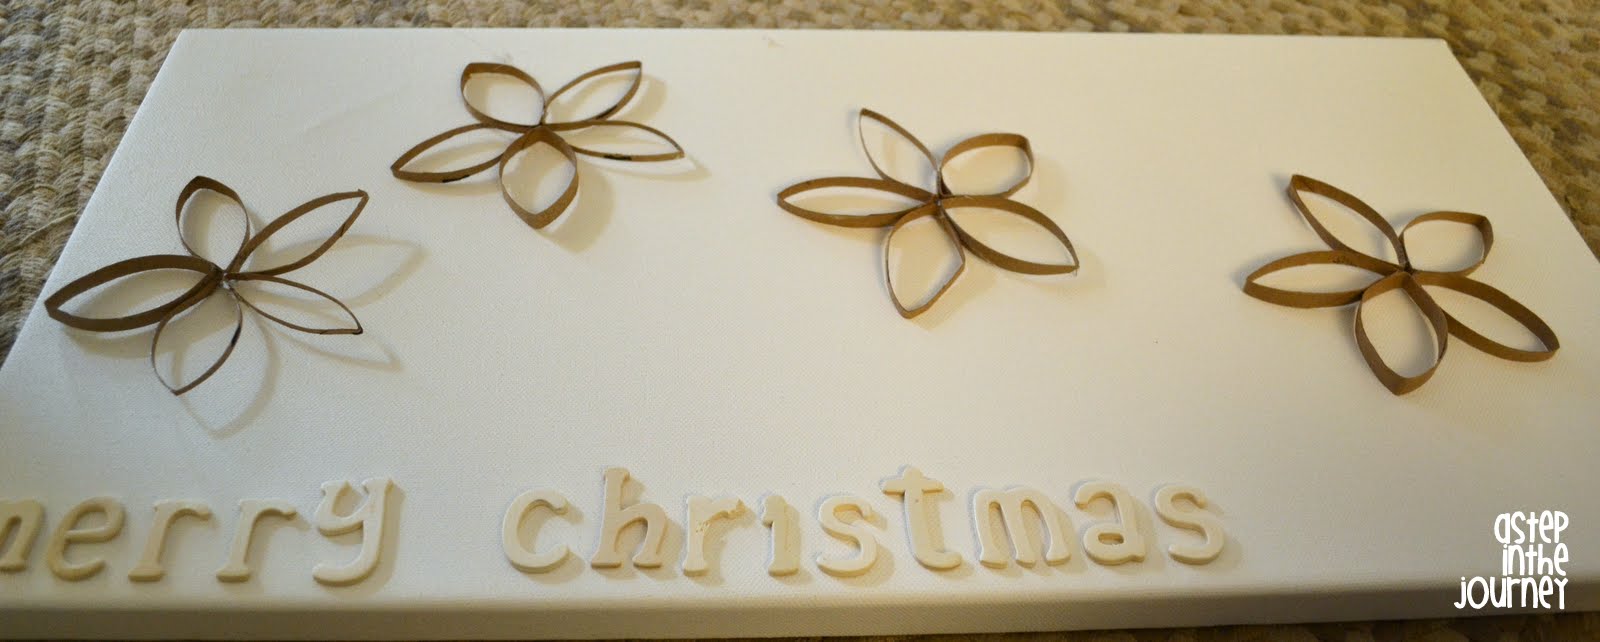
For the poinsettias,
I actually glued down the flowers first, and then the letters.
Next I wrapped a little twine to create the centers.
I also glued down the strings and attached a bow at the top.

Now I know poinsettias are red, but I wanted to get the FULL Christmas affect. To create the green fill, grab the green paint swatches. Flip over to the back and slide under each petal tracing the shape. Cut, slide back into place and glue.
I did this one petal at a time.

And there you have it!! A little personal artwork to add to your Christmas decor.
Thanks again Ginger for having me!
Hope to see y'all at A Step in the Journey soon.

