
This post brought to you by FrogTape Brand Painter’s Tape. All opinions are 100% mine.
Hello! If you follow me on instagram you know that we have been busy with a few home improvement projects over the last little while. Well...I guess it's been more like the past year! ha! ;) We are almost done with our sun room addition. Yay! For those of you who don't know we've added a sun room just off of our kitchen & living room. It has two entrances one on the left side of the picture, & then we will have French doors in the opening on the right side of this picture. (The doors aren't up in this picture. We took them off to trim them after we installed the floor.) Anyways, I ended up repainting our entire kitchen during the process. Which left me with a nice blank slate to work with. I thought it would be fun to add some stripes to this one small section of wall between the two entry ways. So today I'd love to show you how to paint perfect stripes with a FrogTape how-to tutorial. So keep reading to see how easy this was to do! :)

For this project you'll need a few supplies:
Frog Tape® Sharp Paint Lines Solution Textured Surface kit
measuring tape
leveler
pencil
paint & roller brush

Frog Tape® is awesome to use for this project because it is the only tape with PaintBlock® technology. This technology works with the latex paint to form a barrier that seals the edge of the tape & prevents leakage. My wall was a little tricky because it is textured. It’s even harder to seal those edges when you are working with a bumpy surface. This where the Frog Tape® Textured Surface kit comes in really handy. So let’s get on with the tutorial. :)
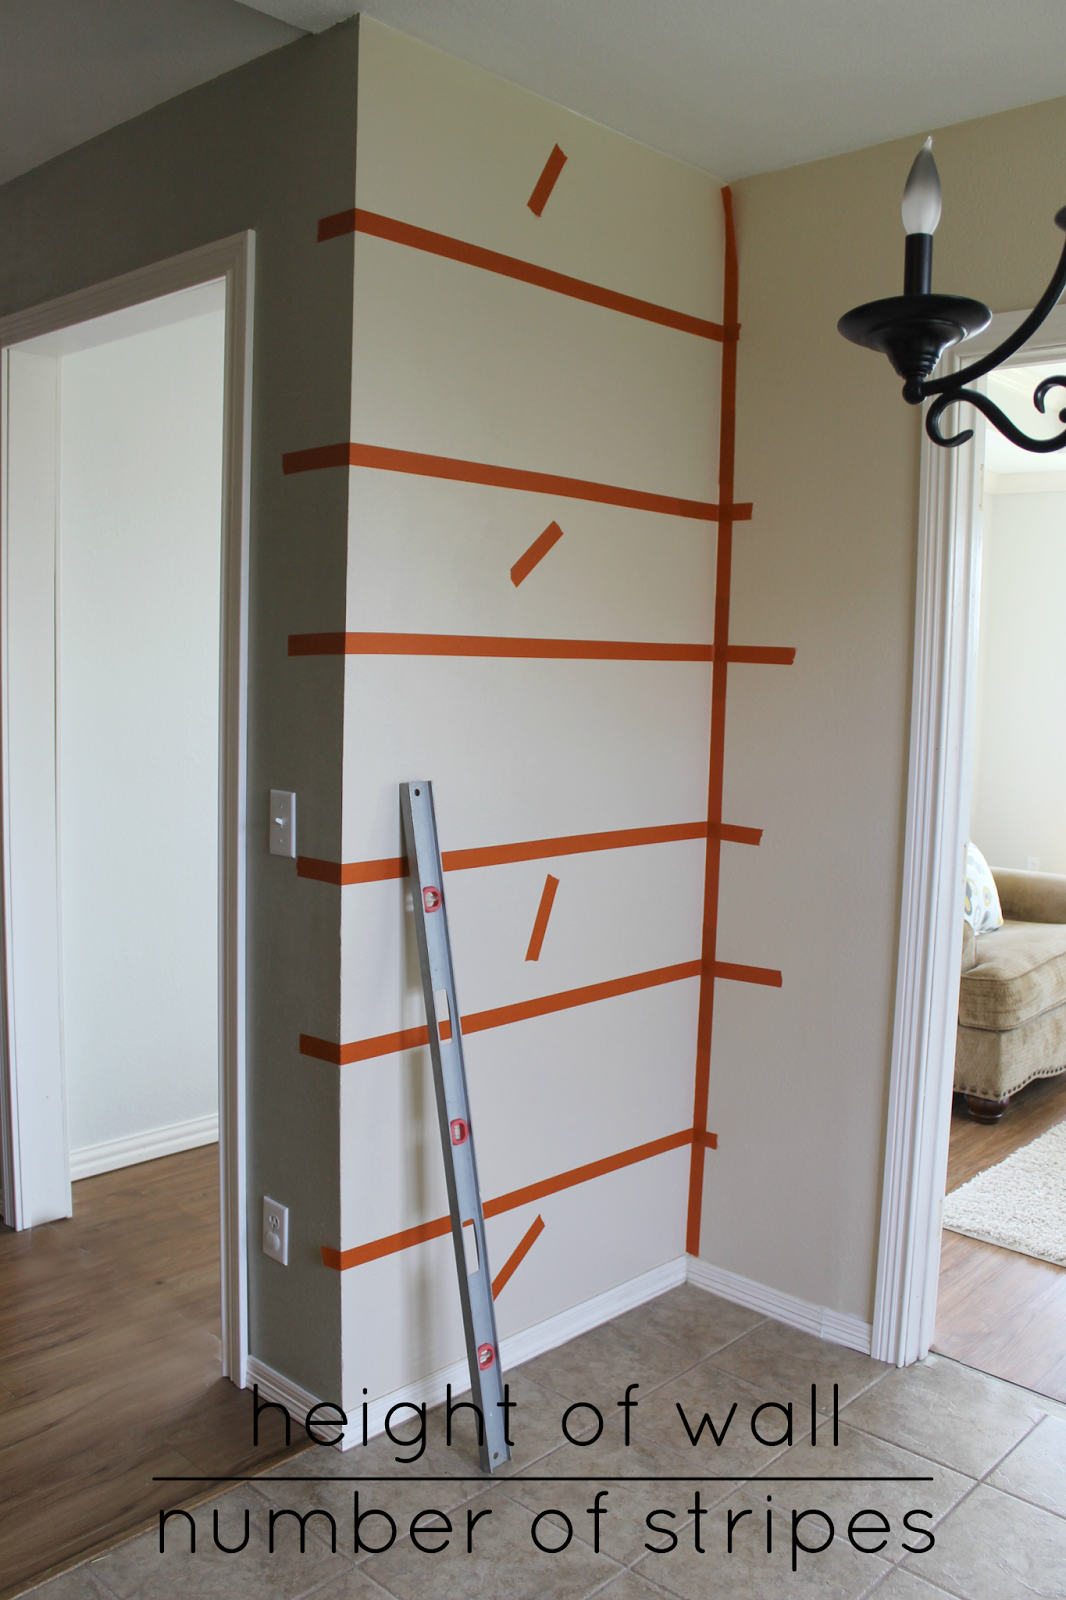
The first thing you are going to do is measure the height of your wall. Our wall was about 96 inches tall. Then you'll divide that number by how many stripes you want. I recommend doing an odd number of stripes. I chose 7 stripes. So my stripes measured around 13 1/2 inches wide (give or take a few). :) Your stripes do not have to be totally perfect. No one is going to come measure them when you're done. haha! :)

I used a long leveler to get my taped lines on as straight as I could. Remember this doesn't have to perfect either. Just get as close to level as you can. Also, make sure you put the tape in the stripes that you will not be painting. To keep it from getting too confusing I just put a piece of tape to mark the stripes that I would not be painting. Another tip is when you are decided which stripes to paint try to avoid painting the top stripe & bottom. It's a lot easier & less work not to have to worry about painting close to the ceiling & trim. :)

Once I had all my tape in place I got a damp rag & rubbed it along the edges of the tape. This activates the PaintBlock® technology, & it helps makes sure there is a good seal on all of the tape edges.

Next I got the Liquid PaintBlock® Sealer from my kit out. I shook the bottle well, & then I removed the lid & put on the brush that came with it.Then you'll apply the sealer in a generous amount along all of the edges of the tape.

Apply it in an overlapping, back & forth &/or circular motions. Make sure you get in every nook & cranny! ;)

Allow the edge sealer to dry for 15 minutes. Now you are ready to paint! I painted about 3 coats of the white paint to get a good coverage.

After the last coat of paint is dry to the touch you can carefully remove the tape. That's it ~ you are done! :)

You'll have to stay tuned to the rest of my plans for my brand new striped wall! I'm loving it already! I will keep you posted on the progress of our addition, too! :) You can keep in touch with Frog Tape® on Twitter.

Thank you so much stopping by my blog!
If this is your first time visiting I’d love to keep in touch. 


Don’t miss a post! Subscribe by email or bloglovin’.

This post was created for Ginger Snap Crafts by Ginger Bowie.
