
Hey guys! I'm Jessica, half of the creative team behind www.prettyprovidence.com and I am beyond stoked to be a summer contributor on Ginger Snap Crafts! Isn't Ginger awesome? I sure think so. At Pretty Providence we believe that you can still look great, eat well, have a nice home and play a ton while living on a budget. Yes, I said the b word. Pop over and visit if you are interested in learning how we do it!
 Today, I am going to show you how I made this nifty gratitude board. I guess we better start at the inspiration behind it, no? I think gratitude is so important. I love this quote about it. Not only does gratitude help us to find joy in what we have, but it helps us to celebrate the people in our life who lift us up. I feel blessed by those around me all the time and I try my best to let them know how much I appreciate them. I love writing thank you notes, but I struggle because with two little ones constantly needing my attention I have found I'm not as good at remembering the little details as I once was. Multiple times in the past month I've found myself asking Bryce "did I send so and so a thank you yet?" as if he would know. I knew I needed a solution, enter the gratitude board.
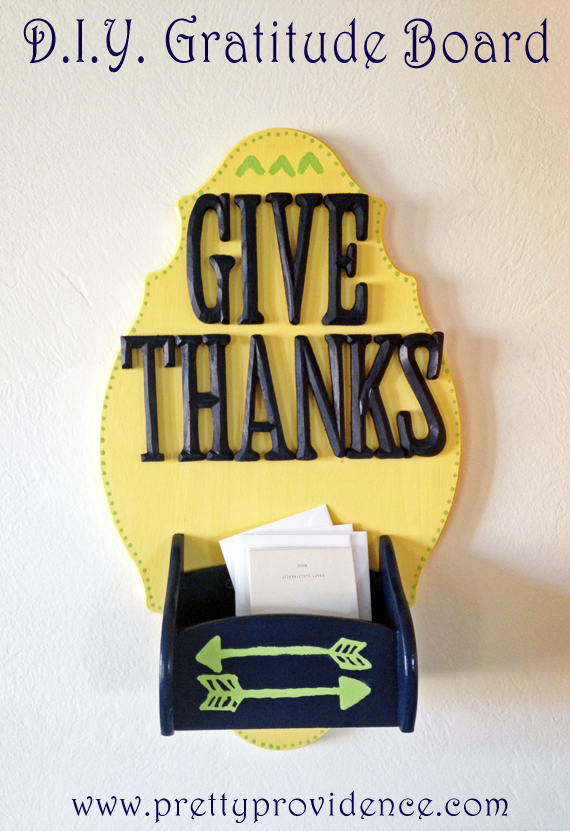
 I wanted something that I could hang in a prominent place in my house (so that I would see it often) that could serve as a reminder to be grateful as well as a thank you card/pen/stamp/envelope/thank you list holder. With these two stipulations in mind, I set out to Michael's crafts.
Here is what you'll need:
a board in any style you like
small wooden letters spelling out "give thanks"
a box of some sort to hold your cards (could be as simple as an old marker box)
hot glue and hot glue gun
paint in 3 desired colors
sand paper + primer (optional)
Here is what you'll need:
a board in any style you like
small wooden letters spelling out "give thanks"
a box of some sort to hold your cards (could be as simple as an old marker box)
hot glue and hot glue gun
paint in 3 desired colors
sand paper + primer (optional)

While you are at the store, lay your letters on your board to make sure you like the way they fit before you buy them.
First step, paint! I used two coats for the board (because the yellow was so light) but the letters only needed one coat of the navy. Because the box I was using already had a finish on it, I primed that first. However, if you are using recycled cardboard or a wooden box found at a craft store that step would be unnecessary for you.
After everything is painted, let dry thoroughly. Once dry, glue your letters and your box on one at a time. Again, lay everything out on the board first so you can see how things fit and make sure everything is correctly aligned.
Here is what my board looked like at this point:

I liked how things were coming together, but I knew the board was too plain for my tastes so I decided to add a few embellishments. If you like a rougher look, lightly sand around the edges at this point. Now, let me state here for the record that I am not an artist! Lately I have been making a concerted effort to allow myself to be more creative... imperfections and all (like with these nautical canvases). For the polka dot boarder I cut a clean edge on a toothpick and used that as a dipper. I free handed the ^^^ and the arrows. They are no where near perfect, but they make me happy and I like them!
All that's left is to add your thank you card supplies to your box and you are good to go! Here's to celebrating our blessings!

If you are interested in learning more about Pretty Providence, check out some of our most popular posts:

Be sure to stop by Pretty Providence. They are ah-mazing! :)
Thank you so much stopping by my blog!
If this is your first time visiting I’d love to keep in touch. 


Don’t miss a post! Subscribe by email or bloglovin’.

This post was created for Ginger Snap Crafts by Jessica @ Pretty Providence.
