
When I first started planning my 1000th follower celebration,
I knew who I’d LOVE to have kick it off…Kitty from A Law Student’s Journey.
I know we’ve all heard it said before that one kind word can change another person’s life.
That’s what Kitty did for me. :) If it wasn’t for her Ginger Snap Crafts would NOT be here!
I wouldn’t be here celebrating with you, you & YOU & having so much fun!
I met Kitty through whoopdwhoop.com. {A fun little site you should check out if you haven’t!}
Kitty asked me to sponsor a giveaway on her blog. {I was so honored & excited!}
This gave me the confidence to start my own etsy shop & then eventually this blog.
Thank you so much, Kitty!!!
_______________________________________________________________
First, allow me to thank Ginger for asking me to guest post over here today! And hello to all of you :)
I'm Kitty from A Law Student's Journey! Ginger and I have been blogging/crafty buddies for a while now,
and I love supporting her, and celebrating 1,000 followers with her!
A little about me first! I'm you're average crafty twenty-something year old...with a twist. I'm also in my second year of law school! I use crafting as my escape from the legal world :) I also have a thriving etsy shop! My boyfriend and I combined our talents in our etsy shop to include my crafts, and his graphic design abilities for fun, affordable items!
Feel free to check it out here! Anyway, I'm here to share one of my favorite upcycled crafts.
Its practically free, and turns out just beautiful! So here we go, the Light Bulb Vase!


What you need:
1. pliers
2. light bulb
3. trashcan
4. work gloves (suggested)
5. wire- like a hanger
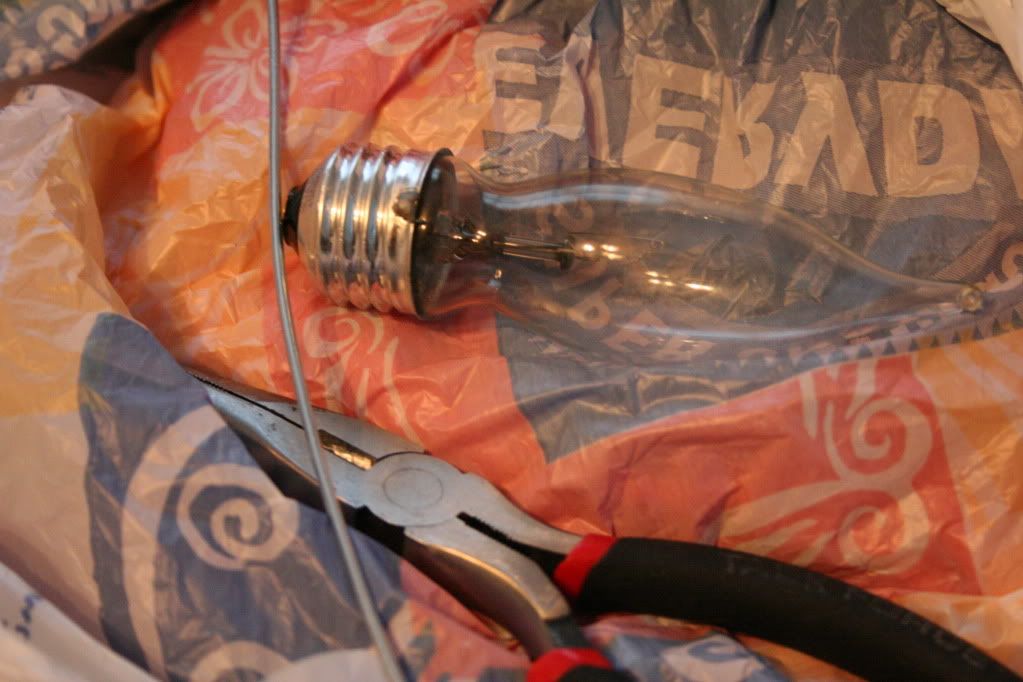
First. Go outside. First rule of Kitty's tutorials- Do as I SAY not as I DO. Do not do this over your bed. You are breaking glass and only people that have had a week of finals thus far are dumb enough to be doing this over their bed. I also- highly suggest work gloves. Once again....breaking glass in your hands.
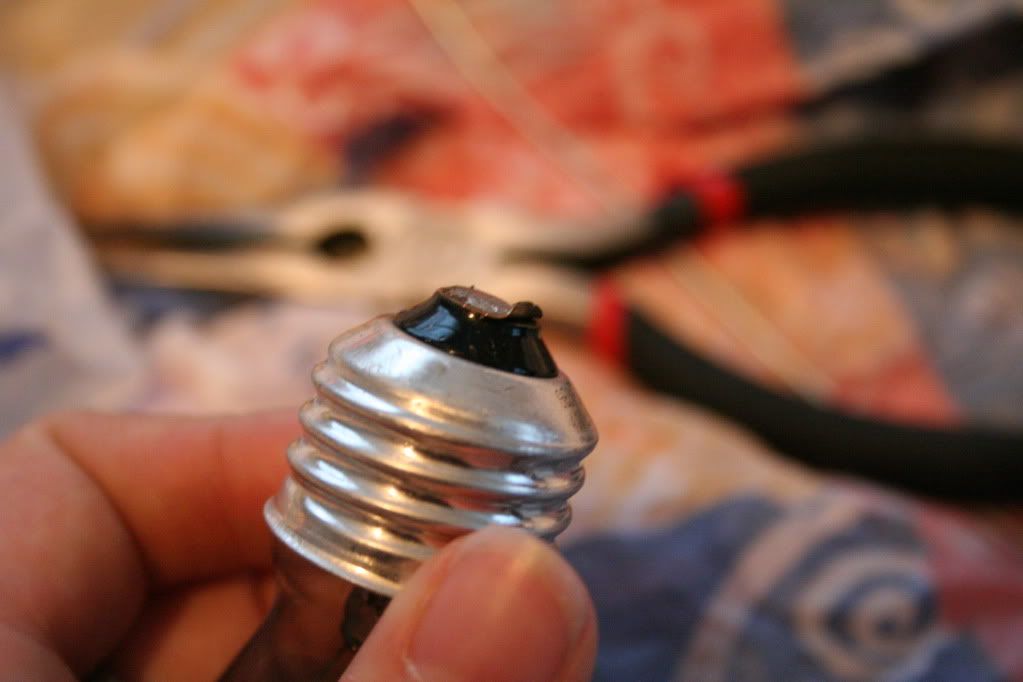
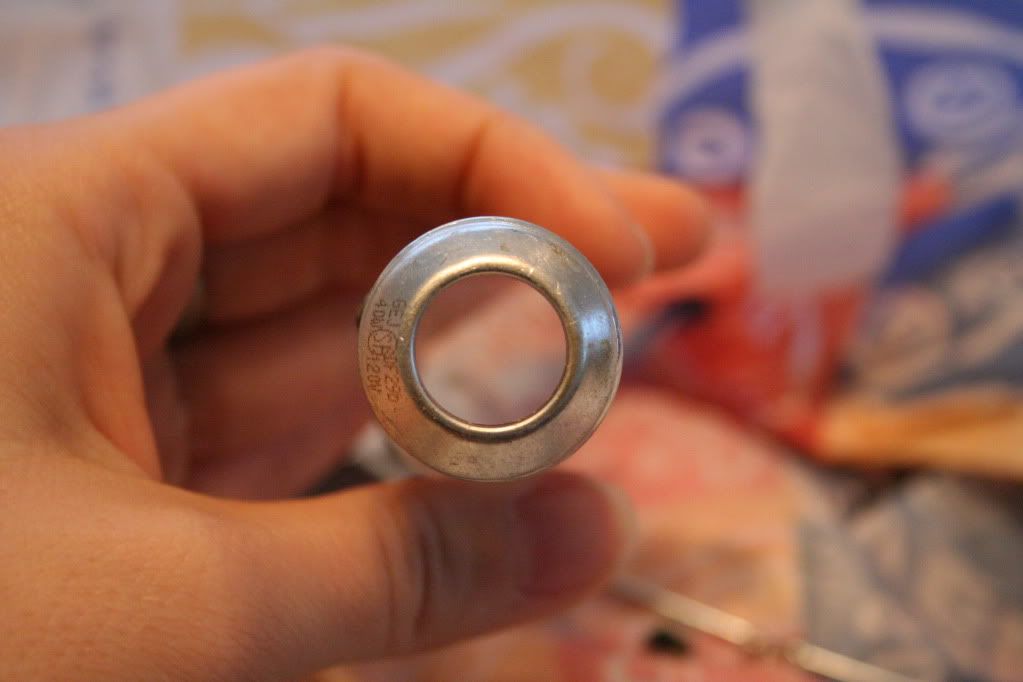
Alright- see that little circle piece? You want that off. You will be peeling/breaking the light bulb in layers. What I found, is to use the wire cutter part of the wires, to pinch/cut it until a little piece folds up enough for you to grab ahold of with your pliers and rip it off
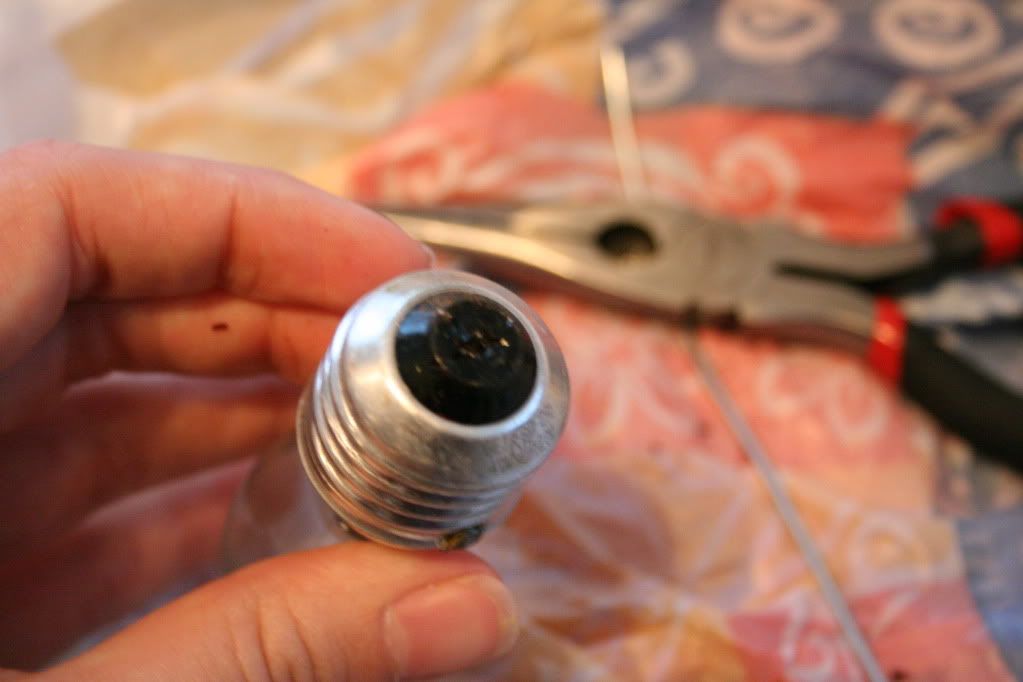
Be PATIENT. If you do any of this too fast, you will break it. And that's no fun. After that piece if off, you want the next piece gone as well. I have no idea if all light bulbs are the same (my guess is not) but I was surprised to find this black piece was actually glass. I decided to use the pointy end of my pliers, to stick in the hole, rotate around in a circle, applying just enough pressure to get it to break. Yes- it will make that awful scratchy glass sound.
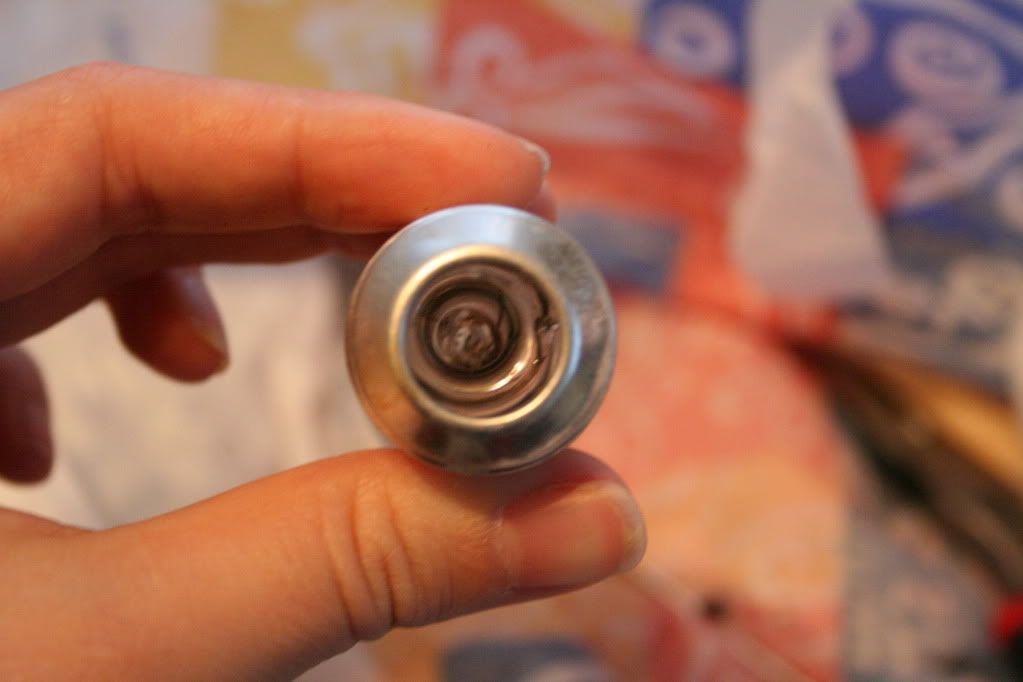
Keep at it, and be patient. In all- this will take maybe 5 minutes, but it will feel like longer when you're working on it. Alright- once that piece is broken- see how the light bulb has a glass tubey inside of it. Once again you want that out.
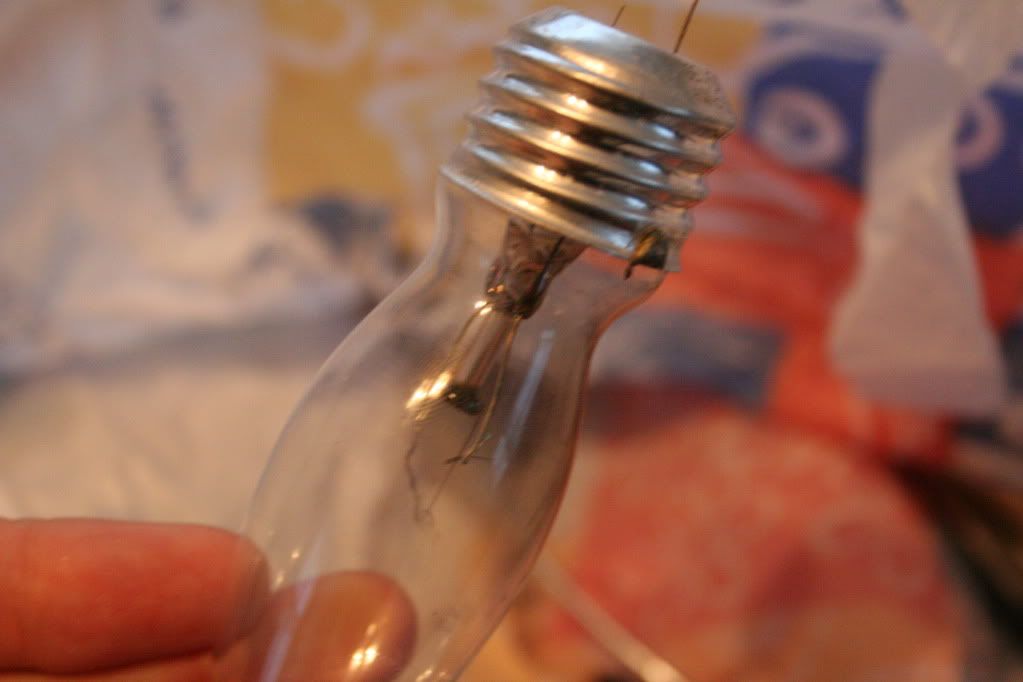
Here is the tricky part. The bulb is one whole thing of glass, so the tubey part is still connected to the outside. You want to jab that tubey party gently, without breaking the rest. I use a wire for this, or the end of my pliers. Don't do it too hard, or you will break it. keep jabbing, and rotating it until the glass is broken. Then make sure the hole is big enough at the top by scratching your pliers around the rim until it breaks just enough
And there you have your emptied out light bulb. Well- full of broken glass at this point.
Dump that out, wash it out and there you have it!

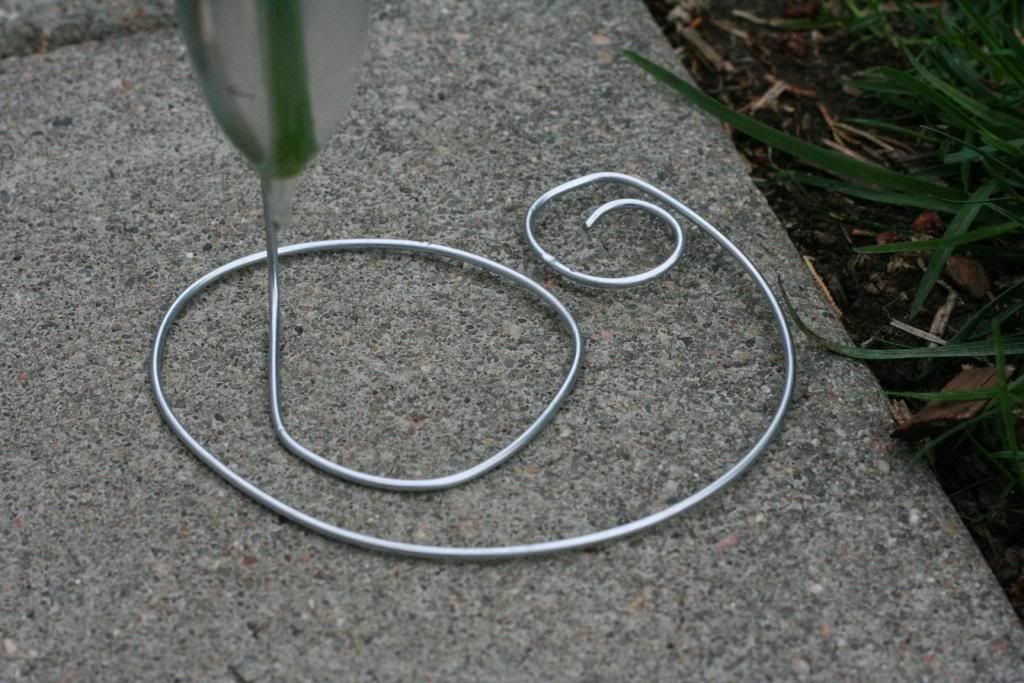
As for the holder- I made mine from wire (like a wire hanger) See the picture- I just bent it around to give it enough support. That part is totally up to you. You could also take a cap, or paper ring of some sort to let it set in to stabilize it!
Hope you enjoyed the tutorial!
