Ginger Snap Crafts: makeover
Showing posts with label makeover. Show all posts

9 DIY Home Projects

Good morning! Awwww…..it’s almost spring! You wouldn’t know it by all the snow on the ground, but it’s a coming! Yay! When the weather warms up, it always puts me in the mood for my next DIY project! How about you? ha! ;) I have a pretty long list for this year. Hopefully, I’ll be sharing some finished projects with you soon! Buuuut first check out these 9 DIY Home Projects that were linked up to the last several {wow me} wednesday parties. Remember this week’s party is still going on, so feel free to swing by & check that all out. If you are a blogger, be sure to link up your ideas. I’d love to feature you, too. You can do all of that here. Buuuuut first check out this amazing feature post! Enjoy! :)

Armoire Makeover with Devine Color + Target

This is a sponsored post written by me on behalf of Devine Color. All opinions are 100% mine.

Hello there! I have a confession to make. :) Even though I'm a DIY blogger, I still have projects on my to do list that sit and sit and sit. You know when you buy all the supplies to make something, and then they sit on your closet floor for months? Or you have tons of ideas pinned on Pinterest, but you just never get around to them? Or maybe you have a piece of furniture sitting in your garage (patiently) waiting on its makeover? Well, that was me! ha! I bought this armoire almost a year ago. It's been collecting dust & random garage items for months. It was dying for a makeover. With a little help from Devine Color + Target, it was finally time. :)

Armoire Makeover at GingerSnapCrafts.com #forthehome

Let me show you the before. A little bit 80s, wouldn't you say? :) I bought this armoire for $50 from a friend of mine last summer. I have a thing for armoires! ha! I knew it had good bones, and it just needed some TLC. I loved the crown molding & all the details. I loved that the doors swung all the way open. I loved the two huge drawers at the bottom. I didn't love the color, and the hardware had to go. It was a bit clunky & dated for my taste.

armoire before

Annnnd the back....not sure why it had a huge hole cut out of it? Hmmmmmm......

armoire before 1

Yep, it was time to plan a makeover & head to Target. :) If you have been to Target lately, you might of notice the amazing line of Devine Color by Valspar products in the home improvement section near the light bulbs. Tip: If you don't live near a Target, you can always purchase all of these amazing products online at target.com. Simply search for Devine Color & everything should pop right up. By the way, these products are only available at Target. They are designed to coordinate with Target home decor, and they are perfect for every budget. All I needed for my project was one can of paint & one roll of wallpaper.


I literally spent a good 30 minutes in Target just enjoying & thinking about all the amazing colors and design combinations. Tip: I love how the wallpaper has color swatches right on the label to match up with coordinating paint colors. It makes it super simple to decide what patterns match with what colors. I ended up choosing a fun almost coral color called Devine Primrose and a coordinating wallpaper to go along with it called Suit & Tie.

For this project you will need:

  • Devine Color by Valspar Creamy Wall Coatings Interior Paint & Primer
  • foam roller brush
  • drop cloth
  • hand sander
  • medium grit sandpaper
  • new hardware (optional)
  • wood filler (optional)
  • 1 sheet backing board
  • table saw
  • Devine Color by Valspar Peel and Stick Removable Wallpaper
  • straight edge cutter
  • cutting mat

Once I got home with my goodies, the first thing I did was take my armoire completely apart. I removed all the hinges & old hardware. I filled any screw holes that I wasn't going to be using anymore with wood filler. I let that dry. Then I sanded down my entire armoire. I didn't sand all the way down to the bare wood, but I did sand just enough to get any shiny, glossy areas off. After everything was sanded, I cleaned off all of the dust using a damp cloth. 

armoire before 3

Now the fun begins! It's time to paint!

armoire8

Whenever I'm painting furniture I always use a 4 inch foam roller brush. I find that it always helps give a nice smooth finish when you use that type of brush. Plus, the paint goes on quickly with a roller type brush. It was amazing to see how smooth this paint went on. Even with just one coat, the color was amazing. It adhered to the wood perfectly. I ended up doing two coats of paint on the whole armoire with a 3rd coat just to touch up areas I had missed.

armoire7

Next, I cut a new backing piece for the armoire. If you remember in the before the backing piece had a big hole right in the middle. Tip: Don't forget to cut a small hole for your plugs to go through!

armoire2

I mentioned this before, but here's a close-up look. I love how the wallpaper shows matching paint colors.

armoire3
To cover the backing board, I needed two sheets of wallpaper cut just a little bit longer than the backing board. I smoothed it out working on one end & smoothing it with my hand until it was all nice & flat. Just be sure to work out any bubbles. The great thing about this wallpaper is that it's removable. If you have an air bubble or if it's a little crooked, simply remove it & reapply.

armoire4
When my back was completely covered, I just flipped it over & used a straight edge to remove the excess wallpaper.

armoire5
Here's how it looked before I screwed it onto my armoire.
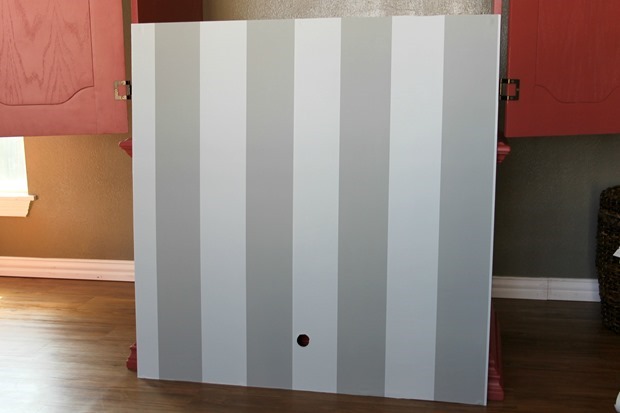
armoire6
Annnnnnnd here's the after. I kind of love it!
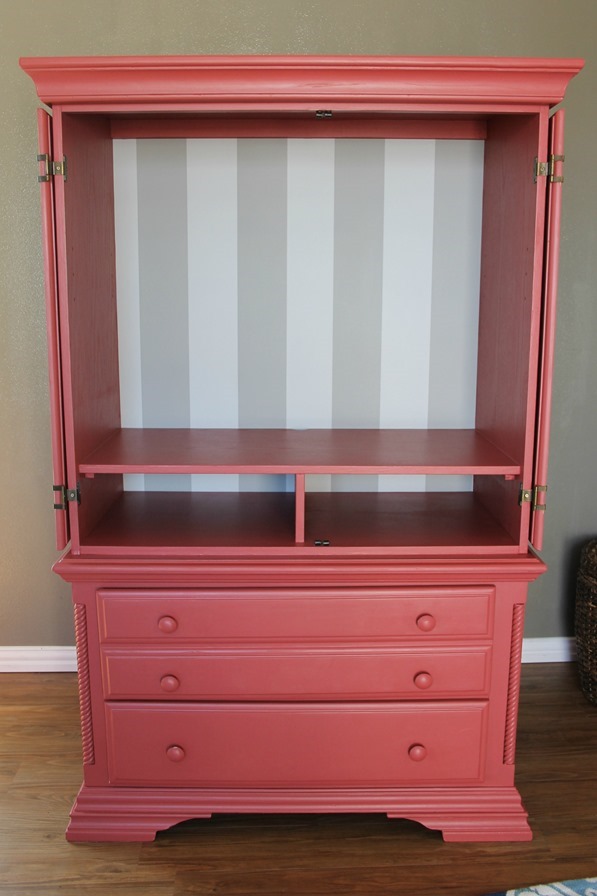

armoire1

I accessorized my armoire with a few goodies that I found at Target. I added a few baskets (I love baskets!), a navy throw & a fun rug. All these items tie in together to make our new armoire feel cozy & right in place in our home. I love how Devine Color products are especially created to coordinate almost seamlessly with the amazing Target decor line. It makes decorating your home so, so easy!

tv cabinet makeover with Valspar

These fun baskets from Target fit perfectly in the shelves. How cool is that? They are perfect for storing remotes & game controllers for my kiddos.

armoire2

I also used baskets from Target to organize the drawers underneath. Can you spot the Devine Color wallpaper underneath? I had enough on one roll to cover the entire back and the bottom of both drawers. Awesome! :)

armoire


If you look close, you can see my curtains. Yep, you guessed it! They're from Target, too!

armoire makeover

Do you have an old piece of furniture sitting in your garage?
Don't be afraid! Pick up some Devine Color at Target,
& soon your home will have a brand-new look at an affordable price!
If I can do it, I know you can too! It's easy to make big changes in your home. :)
Be sure to follow Devine Color on Instagram for more inspiration! :)

Armoire Makeover at GingerSnapCrafts.com #forthehome

Visit Sponsors Site

Thank you so much stopping by my blog!
If this is your first time visiting, I’d love to keep in touch.

post-signature-pink_thumb


This post was created for Ginger Snap Crafts by Ginger Bowie.

Yum

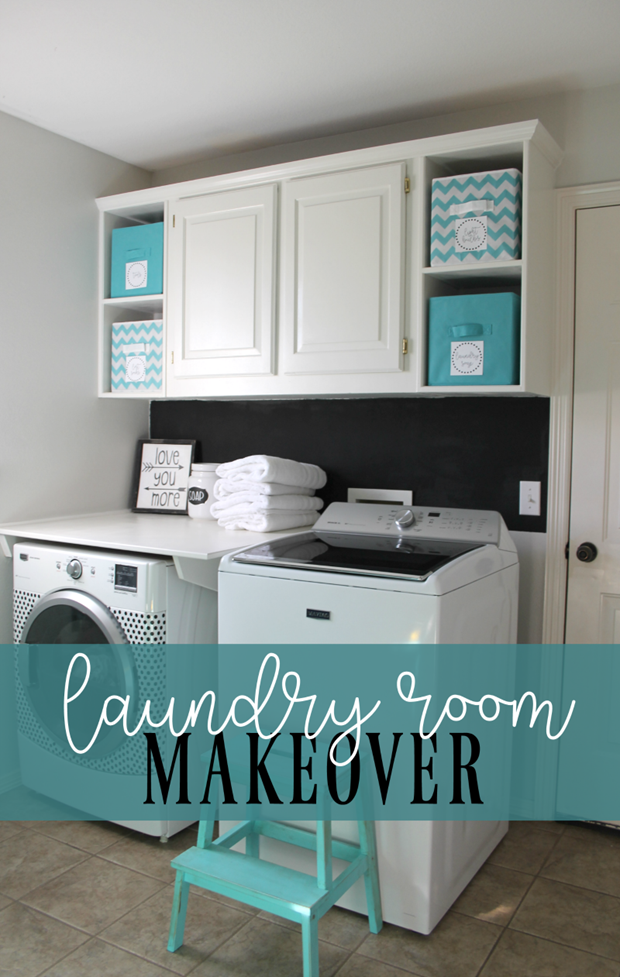
Laundry Room Makeover for Under a $100

This post is brought to you by Life Storage.

laundry room makeover

Bathroom Updates & Organization Tips

This is a sponsored post written by me on behalf of The Duck Brand. All opinions are 100% mine.

Hello there! Today on the blog we are going to a place where few have ever been before ~ our master bathroom! Eek! Scary! ha! Most of the time this room is off limits to guest! ha! (When you see the before pictures you will see why!) Buuuut now it is all clean & organized thanks to some help from Easy Liner® with Clorox®. Ahhhhhh! So keep reading for some easy Bathroom Updates & Organization Tips. Let’s get started! :)

Bathroom Updates & Organization Tips at GingerSnapCrafts.com #organization #tips

Mudroom Bench Makeover

This post is brought to you by DecoArt.

Hello! How was your Thanksgiving holiday? Wonderful, I hope! Ours was fantastic….I ate a little too much, but that’s OK, right? ;) Earlier last week (while cleaning the house getting ready for company) I decided to redo a bench we’ve had in our mudroom/laundry room. This little bench just didn’t fit in with the bright, fun decor we have going on in there! I decided to use Americana Decor Maxx Gloss in Aqua Waters. (This high gloss, durable paint is also available in 19 other high-gloss, trendy colors.) So keep reading to see how easy this bench was to transform!

Mudroom Bench with Maxx Gloss Paint from DecoArt.com

Chalky Finish Bench Makeover #chalkyfinish

This post is brought to you by DecoArt. #chalkyfinish #decoartprojects

Hello! Good morning! I don’t know if you are like me, but I have a gazillion things on my “I want to get this done” list. Annnnd sometimes it takes me quite a while to get things check off that list. ha! Buuuut it feels so good when I do! ;) I have wanted to makeover the storage bench in our front entry way for forever. It has gotten pretty beat up & bang up over the years. I finally took a day & got it done with some help from the fabulous Americana Decor® Chalky Finish Paint line & supplies. So let me show you how I did it. Let’s get started!

chalky finish bench makeover with #DecoArt #gingersnapcrafts

7 Amazing Makeovers

Hello! Wow! What a week we’ve had! :) School started on Monday, and we are trying to get settled into our new routine! I think I’m going to have some tired kiddos by the end of the week! ha! ;) Today I am so excited to feature 7 Amazing Makeovers that were linked up to the last several {wow me} wednesday parties. You’ll have to click over to see the befores. You won’t believe it! Remember this week’s party is still going on right now. So feel free to swing over & check out this week’s link ups. If you are a blogger, I’d love to see what you’re up to! You can do all of that right {HERE}. Buuuut first check out these amazing transformations! Enjoy! :)

7 Amazing Makeovers at GingerSnapCrafts.com #linkparty #features

13 Pretty Projects

Hello! It’s my favorite day of the week I get to feature just some of your fabulousness! ;) I was blown away at the last several {wow me} wednesday parties. You guys have been busy! While I have been lounging by the pool ~ you have been getting your DIY on! ha! :) You have inspired me to tackle a few new projects in my house, too! ;) Today I’m excited to share 13 pretty projects to inspire you as well! Remember if you are a blogger, I’d love to see your latest projects & ideas at this week’s party that is going on right {HERE}. If you’re not a blogger feel free to browse the links to find some amazing inspiration! :) Buuuut first check out this pretty feature post. Enjoy! :)

13 Pretty Projects at GingerSnapCrafts.com #diy #homeprojects #linkparty #features

Ruffled Lamp Shade with LED Power {tutorial} #LEDSavings #CollectiveBias

I am a member of the Collective Bias®  Social Fabric® Community.  This shop has been compensated as part of a social shopper amplification for Collective Bias and its advertiser. #LEDSavings #CollectiveBias

Hello! How are you? Awesome, I hope! Well, today I’m excited to share something fun I  found while shopping at Target last week ~ super bright LEDs light bulbs from GE. Some of these bulbs can last over 20+ years! Isn’t that awesome? Just think of the savings you’d have if you didn’t have to shop for light bulbs for over 20 years. It could really add up quick! :) I’m also excited to show you my latest DIY project with lots of LED power ~ a cute ruffled lamp shade. So keep reading to see how I made it! Annnnd I’ll tell you more about these light bulbs & where you can go to get a coupon! ;)

Ruffled Lamp Shade Tutorial at GingerSnapCrafts.com #tutorial #LEDSavings #CollectiveBias #cbias #shop

Lamp Makeover with Americana Decor Chalky Finish Paint

This post is brought to you by DecoArt.

Hello! Today I’m excited to show you my most recent project with Americana Decor Chalky Finish Paint. Yay! :) (Do remember last month I when showed you my new kitchen updates using this amazing paint? If not check them out HERE.) Today I’m going to show you how I made this quick & easy makeover for the lamp in our master bedroom. So keep reading to see how I did it. :)

lamp makeover with Americana Decor Chalky Finish Paint