Ginger Snap Crafts: vinyl negative
Showing posts with label vinyl negative. Show all posts

DIY Stenciled Tray {tutorial}

This post is brought to you by Silhouette.

Hi there! Today I’m excited to share how I turned a plain wooden tray I found at the craft store for a couple of dollars into a super cute DIY stenciled tray using my Silhouette! Annnnd remember this month’s super awesome promotion is still on right now through the end of the month! Eek! You can get all of the details {HERE}. Just make sure you use the code GINGERSNAP to get the discount. :) Now let’s get to that tutorial. :)

DIY Stenciled Tray with SilhouetteAmerica.com at GingerSnapCrafts.com #SilhouetteCAMEO #SilhouettePortrait #gingersnapcrafts

My Ten Favorite Silhouette Projects {+ February Silhouette Promotion} #Silhouette

I am so excited to let you know about Silhouette’s ah-mazing February Promotions! :)

  • When YOU use the promo code GINGERSNAP between February 1st and February 14th you can get 1 Silhouette Portrait™ and 1 double-sided adhesive starter kit for $179.99. {That is an awesome deal!!!}
  • If you already have a cutting tool and are just interested in the double-sided adhesive starter kit you can purchase the starter kit for $12.99.
  • To get these ah-mazing discounts you’ll need to click {here} or click the picture below:

#Silhouette February 2013 promotion

Next week I’ll be sharing a tutorial using the double-sided adhesive from Silhouette!
Can’t wait to show you!  Buuut until then here are my top ten favorite Silhouette projects.

how to {family reunion t-shirts}

My hubby’s side of the family had a HUGE family reunion recently!  Can you find me?  I’m the one on the left holding my little man. :)  My other kiddos are all mixed in with their cousins.  Do you see my hubby?  Nope…he was out of town for the first couple of days & missed the family pictures. :(  {I know he was in BIG TrOuBLe!}  Buuut don’t you just LOVE our matching shirts? :)  They were easy breezy, too! 

Here’s how we made them:

IMG_0486  IMG_0487  IMG_0494  IMG_0495

First I cut a BUNCH of stencils out in vinyl using my Silhouette clip art & machine.  Then we applied the vinyl to our t-shirts.  TIP: Put a piece of cardboard between your shirt & the back before you start painting just in case!  I used this craft paint from Hobby Lobby…whatever paint you use…read the label first & make sure it says it’s OK to use for fabrics.  It will work much better.  It won’t be as stiff!  Trust me! ;)

IMG_0497  IMG_0498  IMG_0503  IMG_0505

Then tap your paint on.  Remember no back & forth.  Just light taps.  :)  Let it dry completely. Then carefully remove your vinyl.  You might need to use a sewing needle to remove any tiny pieces of vinyl that are left, AND there you go fun fAmiLy shirts.  Don’t you just LOVE when everyone is matchy matchy!??!! I do! :)

IMG_0509


OMTWI round 2 {new laundry room sign}

Thank you, thank you for keeping me in another week!
I’m having so much fun, I LOVE getting out of my “crafty comfort zone”.
I’m also very humbled & amazed to be grouped together
with this wonderful group of CrAfTy ladies!  You guys are awesome!
So did you guess right??  My project was the laundry room sign!
(AND for this project I broke out my big boy…my Cameo for the first time!  So fun!}
 
 
For this round I chose to make a
{new} laundry room sign from an old cabinet door!
 
I've had this old cabinet door forever!  Finally got around to making something with it!  Yay!  Thanks, OMTWI! :)  Basically I cut some vinyl using my Cameo, it's digital design & software.  I used the vinyl negative {the part you usually throw out} to make a stencil that fit my board perfectly.  I used DecoArt Designer Series All-Purpose Acrylic Paint in white in this project.  I really wanted to try the DecoArt Stencil Paint but they didn't carry it at my Hobby Lobby.  :(  The DecoArt acrylic paint worked pretty well though! Yay!  I did had a few hiccups & change ups along the way, but I LOVE how it turned out! (*For all the hiccups & change ups see below!) After I was done with the words I slightly roughed up the cabinet door edges with sand paper & then hung it on the wall.  :)
I love, love, love it!  I keep going in my laundry room again & again to look at it! 
You'd think I'd get more laundry done this way...but no luck! 
Still got piles & piles of laundry to do!  :) 
So, I'd better get busy! ;)


*OK…you ready for the not so glamorous parts! :)  I used the DecoArt paint (the white paint) for the word laundry, BUT I used some paint I already had for the other words…a tan colored paint---a latex paint.  Not to self…DO NOT use latex paint for stenciling!  You know how it’s a little stretchy… well, when I went to take off my vinyl stencil the paint wanted to come off too!  gggggggrrrr!!!!  So I had to use my handy dandy metal spatula (Yes, you can call me MacGyver!) to scrap off all the messed up paint! Another grrrr!!.  I ended up having to restain the cabinet door to get it looking nice again…so the white DecoArt paint (which stencil fabulously) is now a cream colored because of the stain.  Then I had to redo all the other wording in white….AND then when I went to hang it up I actually made the sign up side down!  I had nagged  asked my hubby (before he went out of town for the week) to drill some holes in the back of the cabinet door so I could hang it up when I was done BUT of course I didn’t even look at the back before I started putting the words on! So add another grrrr!  So here’s my other MacGyver moment I had to use ribbon, staple gun & a couple of nails to hang it up so I could take pictures! Long story short…my almost crafty disaster turned out to be a success!  Love my new laundry room sign! :)
 
Thank YOU for voting for me & keeping me in the competition!
I’m excited to see what everyone does next week.
Next week’s challenge is Styrofoam!!!  Should be interesting! :)


Have a fabulous weekend!


fab friday {vinyl stenciling}

I wanted to try something a little different. :)


My partner, Melissa, loves C.S. Lewis.  I love this C.S. Lewis quote, & I thought Melissa would, too. :)
I used vinyl as a stencil to make the background a little more interesting. :)


First I painted my board with grey paint.
Then for the background I used this cute pattern from the Silhouette online store.
I used white vinyl, but you really could use whatever color you had since it's going to be used as a stencil.
I cut it the size I needed using my straight edge paper cutter.


I wanted the vinyl to stick really well.
After I applied the vinyl & before removing the transfer tape
I made sure to rub it really well over the entire surface.
You don't want the paint seeping through!


Then I painted over the vinyl using white paint.
After the paint had dried completely I carefully removed the vinyl. 
It had left a perfect pattern. {Love it!}


Next I applied the C.S. Lewis quote cut in black vinyl using the impervious font.


All done!

Don't forget to enter all the {fabulous} summer vacation giveaways!
Winners will be announced ToNiGhT!!!

Have a {fabulous} weekend everyone!!

fab friday {4th of July}

4th of July is right around the corner.
Seriously, the 4th of July is my favorite holiday.
Fireworks, cooking out, family time & being proud to be American.
What could be better than that?
{Plus it's 4 days before my wedding anniversary! :)}


Here's how I made my super easy, {cheap!} and of course, very cute 4th of July decor.


Up first is this super cute flag.
I know you've seen 2x4 flags floating around blogland.
So, here's my version.
My hubby used a 2x4 but for the "stripes"
he cut them in half,
 trimmed them 
& made them fit together perfectly.
{Isn't he smart & like I've said before so handy!}


I painted the pieces red, white & blue.
For my star, I cut a star with my Silhouette & used it like a stencil.
I painted my block white, applied the vinyl, painted it blue & then removed the vinyl.
Voila!  There's a perfect star.  Super easy!


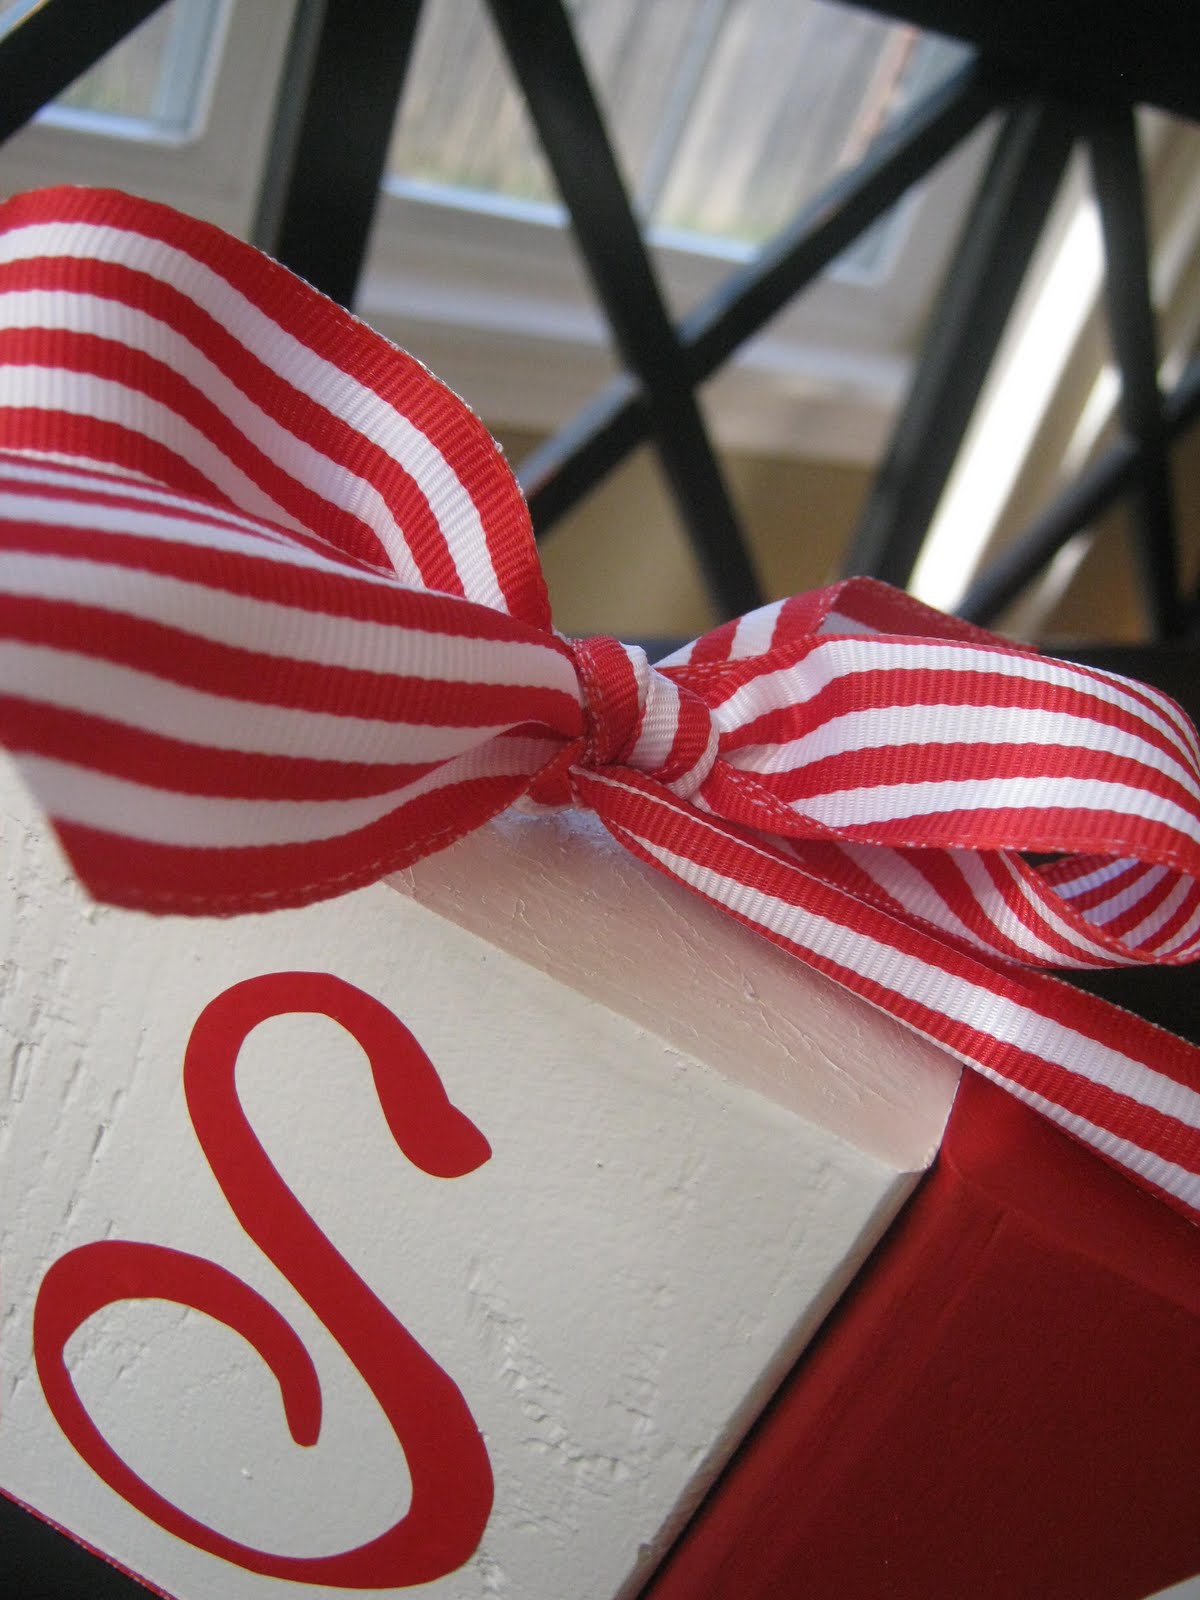
Stack your blocks back up!


Add a bow.


All done!  So easy & cute!


Now for the USA blocks.


For my blocks I just used a 2x4 again {cut it into 4 inch blocks}.
Painted them red, white & blue, of course. :)


Applied the vinyl.
Then you can stack them however you'd like, vertical or horizontal.


Or add a bow like I did.


There you go- all done.


Display them together & you've got a fun, festive 4th of July mantel.
Let the celebration begin!  Happy Birthday, America!


Did you notice my follower count is creeping ever so closer to the 500 mark?
I am so excited.  I'm amazed and humble at all the support
my little blog has gotten since I started just under 3 months ago.
You guys are awesome.  Thank you so much.

Tomorrow I'll be doing a giveaway for a completed set of the USA blocks.
{So make sure you check back ToMoRoW to enter.}

For today, the first 3 FolLoWeRs who comment on this post will receive the USA vinyl for FreE!!!
All you'll need to do is supply the wood, paint & a little elbow grease & you'll have some cute blocks, too.
{Please leave me your email, so I can contact you!}

Have a fabulous weekend!