
This is a sponsored post written by me on behalf of Cricut. All opinions are 100% mine.
Good morning! It’s summer! We are busy, kiddos have been home for months & months & sometimes you just want to create or tackle of home improvement project. I don’t know about you, but I have two requirements for that! These projects need to be quick & easy too personalize. Annnnd if I can do it in 15 minutes or less, that’s even better! :) That’s why I love the Cricut Joy so much! It is the perfect companion to quickly & easily personalize anything with one cut & one color & in 15 minutes or less. It is fun, very functional & easy to use. Practical, everyday projects like this DIY Porch Refresh have never been more accessible or easier! You can take the Joy anywhere & use it anytime. :) Let me show you how I used the Cricut Joy in this simple & fun DIY Porch Refresh.

Cricut Joy is Cricut’s smallest smart cutting machine ever! Really it may be the smallest cutting machine ever! It’s so cute & tiny, but packs a big punch. It can hang out in a cubby in your craft room (like I do) and it even looks great on the kitchen counter. I love that the Joy packs away easily and sets up instantly, making it super easy to move from room to room or even your front porch. Annnnd I love the Bluetooth! It’s life changing! You don’t even need to hook the Joy up to your computer. You can even download the Joy app to your phone & craft away. Yep! It’s so easy to use to Joy! :)

Because of its amazing & unique design, Cricut Joy uses Cricut Smart Materials, which are different from other vinyl & paper. These materials are designed to work without a cutting mat. Yay! No mat! So that means there’s less to buy and transport with the Joy. You can also cut up to 20 feet with the Joy. Eek! That’s amazing! FYI: You can also use a mat with the Joy which means you can finally use up all those vinyl & paper scraps! Truly the possibilities are endless with this cute little machine. I really feel like the Joy will quickly become my go-to machine when I need to create something quick for my home & family. :)
For these porch projects you will need:
Cricut Joy
Cricut Smart Iron-on (black)
Cricut Smart Vinyl (black)
Cricut Transfer Tape
Cricut Joy Starter Tool Set
pillow covers
pillow inserts
Cricut EasyPress
Cricut EasyPress Mat, large
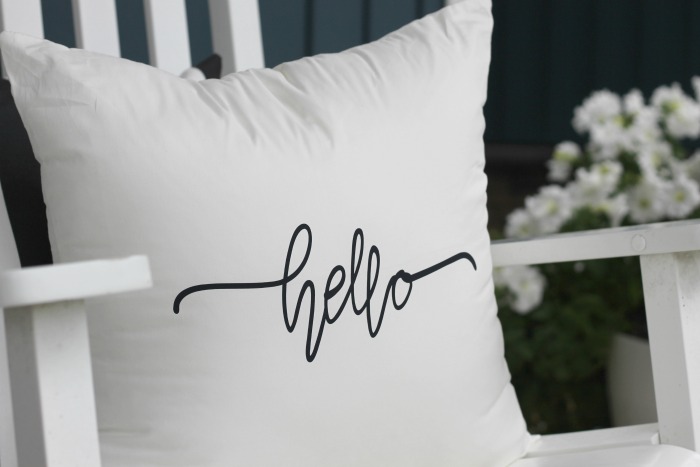
First, let’s start out with those cute pillows. You can get these same cut files in Design Space right here. You’ll open up Design Space. Size the hello & welcome to fit your pillows. FYI: My pillows were made with 18x18 inch pillow covers for reference.

Then you’ll send your design to your Cricut Joy. Since I was using smart iron-on, I didn’t need to use a mat. Yay! :) So I clicked without mat & clicked done.

Since we are working with iron-on make sure you mirror your image before cutting.

Next, set your material to smart iron-on.

Load your materials.

Then let your Cricut Joy do it’s thing! ;) Click unload when finished.


Then you’ll weed your design using your Cricut weeding pick. Iron-on is so easy to weed by the way!

Now you are ready to apply your design using your Cricut EasyPress.

I love using the Cricut EasyPress Heating Guide when using my EasyPress. It makes it easy to get the temperature & time just right. My pillow covers were 100% cotton. So I set my EasyPress to 300 degrees & 30 seconds & cold peeled.

Cold peeled means I removed my backing paper once my design had cooled down.

All done! TIP: These are 18x18 pillow covers & I stuffed them with 20x20 pillow inserts. Doing this will make your pillows nice & fluffy! :)

I love the simple clean design of these black & white pillows on my porch rockers. :)

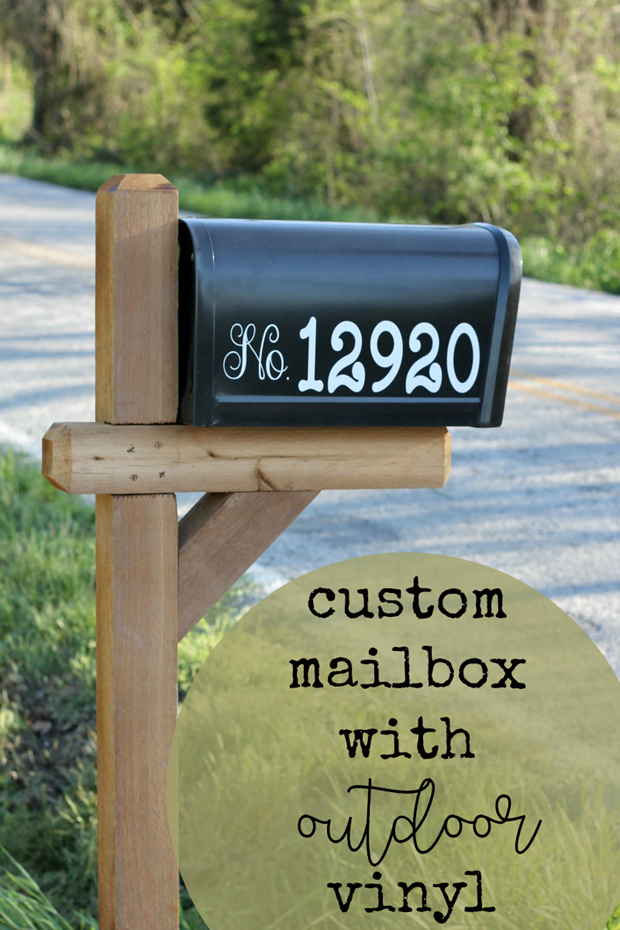
Alright, let’s get to that next porch project. :) Let me show how I added our house numbers to our front door. Since we built our house a few years ago, putting house numbers on the house hasn’t even been on the to do list until now (or a doorbell either!). We are still working on completing everything 2 years later! haha! We did put the house numbers on the mailbox though! ;) Anyways, I cut this decal out very similar to the smart iron-on above except I used smart vinyl instead. So basically you will cut it out, weed & put transfer tape on top. Carefully remove the backing paper.

Place your decal where you’d like it to be and then smooth it into place.

Gently remove the transfer tape (at an angle works best) leaving your vinyl decal behind.

Isn’t that the cutest thing ever? I just love it! Annnnnd in a few months when I don’t love it anymore, I can just remove it, and do something else. That’s why I love vinyl so much! :)
Wasn’t that so easy? How would you update your porch using the Cricut Joy?

Let me know if you try any of these projects! I’d love to see what you create. :) Pin this post for later.


Enjoy these other fun home projects made with my Cricut machine. :)
There is a link below the pictures for the full tutorial.


5 Ways to Organize Your Home with the Cricut Joy
Let me know if you have any questions about the Cricut Joy! I answered many of them here.
Be sure to check out the Cricut blog, where you can find weekly
home renovation project inspiration & tutorials. You can do that here.
Connect with me on facebook or instagram.
Question or comment? Shoot me an email at ginger@gingersnapcrafts.com. :)
Thank you so much for stopping by my blog!
If this is your first time visiting, I’d love to keep in touch.

.
