
This is a sponsored conversation written by me on behalf of Cricut. The opinions and text are all mine. Affiliate links are used. Thank you for supporting Ginger Snap Crafts.
Good morning! Wow! What a crazy week and a half it has been around our house, and I’m sure around yours, too. We are slowly settling into our new normal. I hope everything is going well (as it can be!) in your home, too. I have the privilege of working with some pretty amazing companies. One of those is Cricut! I am excited to take part in a special “use what you have” campaign with them this week. We were challenged to share a fun project that you can do with your family at home using your Cricut machine and just a few items found around your home already. I know for me when I’m crafting with my kiddos it brings me the most joy! Joy is something I could use right now. I can’t wait to share this simple Paper Puppet tutorial with you. I hope you try it out with your family as well. Let’s get started! :) (Annnnnd you’ll want to keep reading after the tutorial….Cricut has some pretty amazing things planned for you, too!)

For this project you will need:
Cricut Explore Air 2
Cricut StandardGrip cutting mat
white cardstock
Cricut pen (black)
colored pencils or markers
jumbo popsicle sticks
glue
the Design Space file*
*For the raccoon and the porcupine I couldn’t get the slice feature to work quite right. So for those two, I cut them out using my TruControl Knife. All the other puppets were drawn & then cut out using my Cricut Explore Air 2. So nice! :)
This project is so simple & fun to watch! ha! I love watching the pen do it’s thing. My kiddos did, too! It’s very mesmerizing & relaxing. ;) So basically you just open up this file, and send it to your Cricut machine.

First, your Cricut will draw out, and then cut out your design. To save space (if you’re low on supplies) try grouping as many animals together as your can in Design Space to fit your paper size & then select attach all. This will help conserve paper. If you are low on cardstock, simply use white copy paper. Then glue your cut out animals onto cereal boxes or construction paper to make them a little more sturdy. Use your imagination! :)

After everything was cut out, my kiddos went to town coloring! Even my college kiddo (who is home a little earlier than expected this semester) joined in. ;) Tomorrow we are going to make a puppet show for entertainment!

When we were done, we simple glued a jumbo popsicle stick to the back. Easy peasy! :)

I think they turned out really cute, and I love how detailed they are. Perfect for teens & tweens (& moms!) to color! :) Be the way, Cricut is working hard to provide access to FREE digital content within Design Space for all of YOU to use during the upcoming weeks. Cricut has made an additional 1,000 images free within Design Space for a limited time (including the cute animal designs I used for these puppets!)

Also, you’ll want to pop on over to the Cricut blog. They will also be posting more stay-at-home tutorials like this paper puppet tutorial that I shared to today. So be sure to check all that out right here. :)

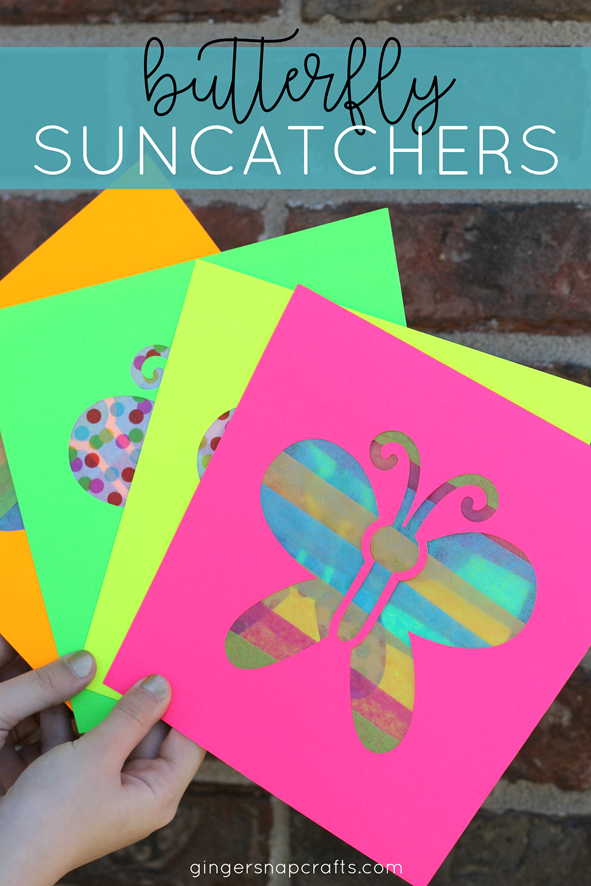
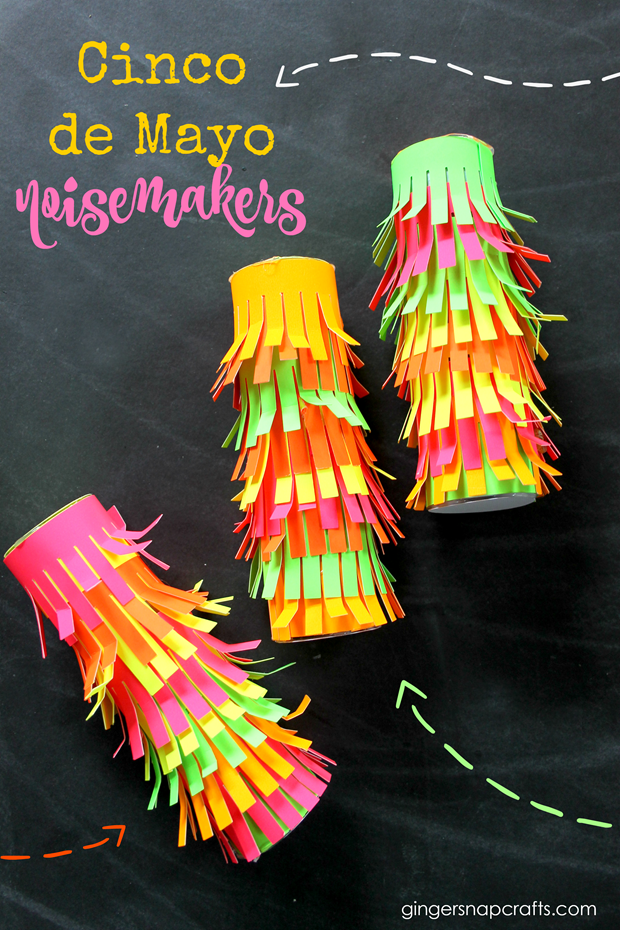
Enjoy these other fun kids crafts with Cricut. :)

Let me know what you are doing to keep busy! :)
Connect with me on facebook or instagram.
Question or comment? Shoot me an email at ginger@gingersnapcrafts.com. :)
Thank you so much for stopping by my blog!
If this is your first time visiting, I’d love to keep in touch.

.
